
In the previous post, we learned about my proposal of an architecture for Azure API Management for integrations. And I closed the post with a pending thing, which was details on how to deploy and configure all the Azure resources the solution uses.
And in today’s post we’re going to see how all the resources are created, linked together and configured to have a fully working API logging solution, and how we can deploy everything using Bicep.
You may also like


And the trick to deploying it is to…
Do it manually!
Of course! That’s the logic way of doing it! With our keyboards and mouses, clicking buttons and entering names, then looking in Azure for configurations, connection strings, enabling options, etc.
That’s what I did the first time I set this up, I created all the resources from the Azure portal by hand, changing the configuration of the different elements until I had everything working fine.
But then I thought that there should be a way of deploying this automatically and if, for example, I had to deploy this in different customers or projects, could reduce the chance of having errors, or just avoid repeating work that can be automated.
I knew about the ARM templates, and I also knew that I don’t like them a lot. That’s when I remembered I had heard about this new thing…
Use Bicep!
Bicep is a language used to deploy Azure resources that we’ll use to create infrastructure-as-code (IaC) solutions.
One of the benefits of using IaC is that it helps automate resource deployments, and helps us to make sure that we deploy the same resources each time our code is run. The same code will always be deployed as the same infrastructure.
To deploy all the resources, you need an Azure subscription. Remember, you can register and get one free and with $200 of credit for 30 days, and that several services are always free of charge.
Bicep uses declarative syntax, which means that we describe what we want the code to do, and how the code does it is a problem of the compiler. I personally find it much easier to read than the JSON from the ARM templates.
And starting using it is really easy, you just need to install the Bicep tools, which if you’re using Visual Studio Code is as easy as installing an extension.
Then imagine you want to deploy a new storage account to your Azure subscription. We’ll write the following code:
resource aristeinfoStorageAccount 'Microsoft.Storage/storageAccounts@2021-09-01' = {
  name: 'aristeinfostorage'
  location: 'westeurope'
  kind: 'StorageV2'
  sku: {
    name: 'Standard_LRS'
  }
}
If you use the VS Code extension it’s almost as easy as writing .NET code, hitting the tab key 🙊 Joking… let’s take a look at the different parts of the code.
All resources are declared using the resource keyword, then aristeinfoStorageAccount would be like the variable name for that resource, and you can use it later in your code to access its members, just like an object in any OOP language. And what comes next, the ‘Microsoft.Storage/storageAccounts@2021-09-01‘ piece, is the type of resource, which the extension helps us look for it, you don’t need to remember how all resources are named.
Then inside the curly brackets we have:
- The name, which will be the name of the resource in Azure.
- The location, is the region where the resource is deployed to.
- kind, is the version of the storage account.
- sku, the tier of the resource.
Of course, different types of resources have different elements in its setup, and different properties.
Before deploying the file, make sure you have installed both the Bicep and Azure Account extensions for VS Code. And first, connect to your subscription by pressing F1 and looking for “Azure: Sign in”.
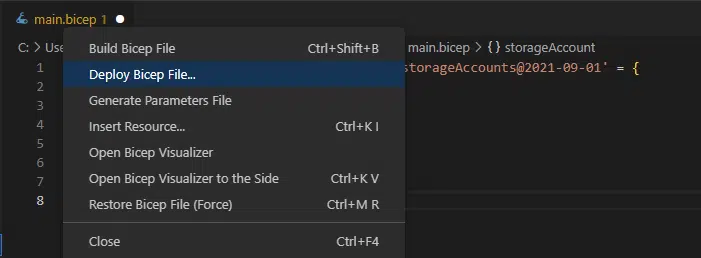
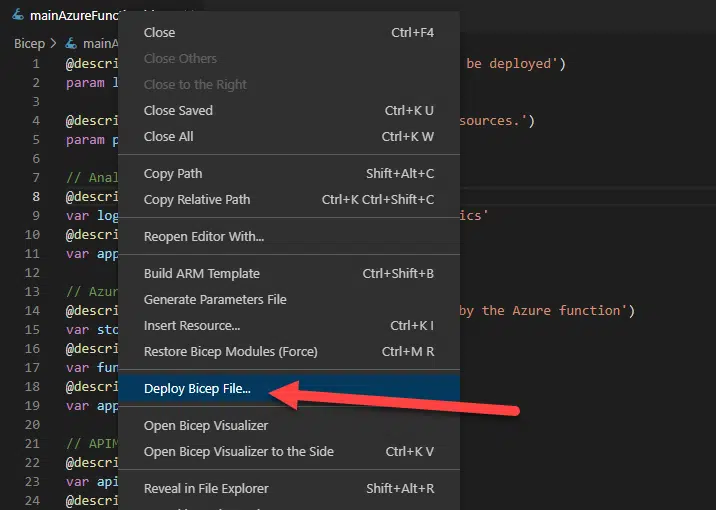
Now to deploy it, you just need to right-click on the VS Code tab and select the “Deploy Bicep file…” option:
Thanks to the Bicep extension you will see a dialog to select the subscription, the resource group (or create one) and after that it will also ask to select a parameter file, select None.
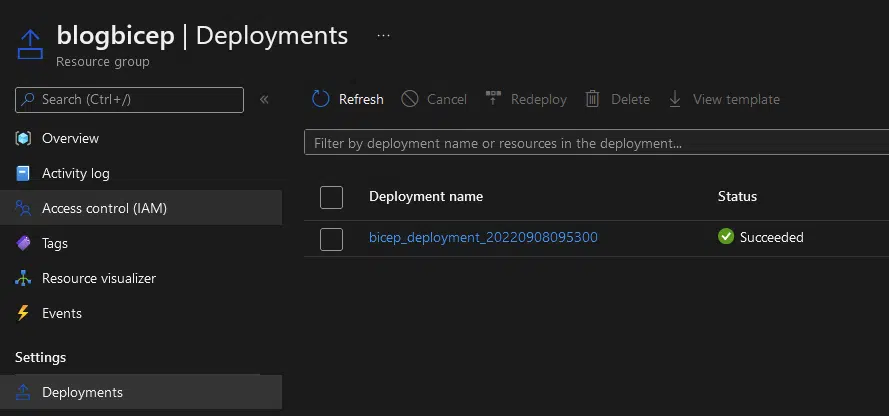
You will see a message in the output window, and if you go to the Azure portal (or click the link in the output window), navigate to the resource group you’re deploying this to, and select the Deployments option you will see the deployment:
And when it’s finished, you can go to overview and see your resource:

It’s that easy, and if you want to learn more about Bicep, you can check Microsoft Learn learning paths for Bicep.
Deploying the APIM solution
I wanted it to be easy for everyone to try this, so I prepared everything and if you go check this GitHub project I’ve created, you will find the following things:
The X++ folder that contains a model with a custom web service that will create a calculator API in your F&O environment. There’s both a model folder and an axpp file you can import in Visual Studio.
The AzureFunction folder contains the code to create an Azure Function that will create a calculator API.
And finally, and what interests us the most, the Bicep folder that contains the needed code to create all the Azure resources, so you can test what I explained in my previous post without having to create all the resources manually. And you have two options.
Deploy an Azure Function
If you choose to try the solution using an Azure function, you just need to deploy the mainAzureFunction.bicep file.
You don’t need to create and deploy the Azure Function because the Bicep file will download this ZIP file which is only the Azure Function packaged to make your life easier, and this faster to try. If you prefer to deploy the function for security reasons, you’ll need to update the azureFunction.bicep file inside the modules folder.
If you choose this option, the dialogs will ask you for the following parameters: Subscription, Resource Group, location (which is defaulted to that of the resource group), prefix to be used as the name of the resources and, finally, email and organization to deploy the APIM (just your email and tenant but don’t worry no emails will be sent).
Deploy X++ code
If you choose this option, you have to download the code from the X++ folder and add it to your environment. Once you’ve done that, you can deploy the mainDynamics.bicep file.
If you prefer using an X++ custom web service to try this, you’ll have to provide additional information. In addition to the same parameters as the ones of the Azure Function solution, you’ll need to provide the environment URL (without the final /), the environment URL with the API information (service group and service name, also without the final /), tenant, AAD App Id and secret.
This way of deploying the code will create a policy in your APIM that will handle the token authentication, that’s why it’s asking for the tenant, App Id and secret.
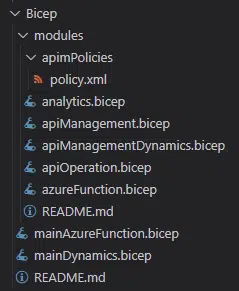
The Bicep files
In the Bicep folder you will find these files:
The mainAzureFunction.bicep and mainDynamics.bicep files are what needs to be executed/deployed, depending on which way you choose to go.
Let’s take a look at the mainAzureFunction.bicep file:
@description('The location where the resources will be deployed')
param location string = resourceGroup().location
@description('A prefix that will be added to the resources.')
param prefix string
// Analytics
@description('Log Analytics workspace name')
var logAnalyticsWorkspaceName = '${prefix}LogAnalytics'
@description('Name for the App Insights resource')
var appInsightsName = '${prefix}AppInsights'
// Azure Function
@description('The name of the account storage used by the Azure function')
var storageName = toLower('${prefix}Storage')
@description('Azure function name')
var functionName = '${prefix}Function'
@description('App Service plan name')
var appServicePlanName = '${prefix}AppServicePlan'
// APIM
@description('Name of the APIM resource')
var apiManagementInstanceName = '${prefix}apim'
@description('APIM publisher email')
@secure()
param publisherEmail string
@description('APIM publisher name')
param publisherName string
@description('Name of the API that will be created in the APIM')
var apiName = 'calculator'
// Analytics resources
module analytics 'modules/analytics.bicep' = {
  name: logAnalyticsWorkspaceName
  params: {
    appInsightsName: appInsightsName
    location: location
    logAnalyticsWorkspaceName: logAnalyticsWorkspaceName
  }
}
// Azure Function Resources
module azureFunction 'modules/azureFunction.bicep' = {
  name: functionName
  params: {
    appInsightsId: analytics.outputs.appInsightsId
    appServicePlanName: appServicePlanName
    functionName: functionName
    location: location
    storageName: storageName
  }
}
// APIM Resources
module apiManagement 'modules/apiManagement.bicep' = {
  name: apiManagementInstanceName
  params: {
    apiManagementInstanceName: apiManagementInstanceName
    apiName: apiName
    endpointUrl: azureFunction.outputs.azureFunctionUrl
    location: location
    publisherEmail: publisherEmail
    publisherName: publisherName
    apiKey: azureFunction.outputs.azureFunctionApi
    appInsightsId: analytics.outputs.appInsightsId
    appInsightsKey: analytics.outputs.appInsightsKey
  }
}
I’ve put the parameters and variables at the beginning of the file and the resources after that.
When you use a parameter, that’s declared using the parm keyword, you need to provide that parameter each time the Bicep file is run.
Variables are declared with the var keyword and… you remember about resources, right? But there are no resources in this file, instead there are…
Modules
In Bicep, modules are files that are deployed from other files. Think of them as other classes which we can use in the main file. It’s something like this.
In modules, you usually group resources that need to be deployed together or that can be reused in other files.
The modules’ folder contains other Bicep files that help deploy all the infrastructure.
For example, let’s take a look at the azureFunction.bicep file:
param functionName string
param appServicePlanName string
param appInsightsId string
param storageName string
param location string
// Storage resources
resource storageAccount 'Microsoft.Storage/storageAccounts@2021-09-01' = {
  name: storageName
  location: location
  kind: 'StorageV2'
  sku: {
    name: 'Standard_LRS'
  }
}
resource appservice_plan 'Microsoft.Web/serverfarms@2022-03-01' = {
  name: appServicePlanName
  location: location
  properties: {}
  sku: {
    name: 'Y1'
    tier: 'Dynamic'
  }
}
resource azureFunction 'Microsoft.Web/sites@2022-03-01' = {
  name: functionName
  location: location
  kind: 'functionapp'
  properties: {
    serverFarmId: appservice_plan.id
    siteConfig: {
      appSettings: [
        {
          name: 'AzureWebJobsStorage'
          value: 'DefaultEndpointsProtocol=https;AccountName=${storageAccount.name};AccountKey=${listKeys(storageAccount.id, storageAccount.apiVersion).keys[0].value}'
        }
        {
          name: 'APPINSIGHTS_INSTRUMENTATIONKEY'
          value: reference(appInsightsId, '2020-02-02').InstrumentationKey
        }
        {
          name: 'FUNCTIONS_EXTENSION_VERSION'
          value: '~4'
        }
        {
          name: 'FUNCTIONS_WORKER_RUNTIME'
          value: 'dotnet'
        }
        {
          name: 'WEBSITE_RUN_FROM_PACKAGE '
          value: 'https://static.ariste.info/wp-content/uploads/2022/08/CalculatorFunction.zip'
        }
      ]
    }
  }
}
output azureFunctionId string = azureFunction.id
output azureFunctionApiVersion string = azureFunction.apiVersion
output azureFunctionUrl string = azureFunction.properties.hostNames[0]
First, we see parameters too. These parameters will be required when using the module in another file.
And then we see the resources. You can see I’m deploying a storage account, an app service plan and the function. These go in this module because those are things needed when you deploy a function.
And at the end we see output variables, that can be accessed from the file that uses the module, like a return in a method.
Deploy
I’m going to show this using the Azure function, I open the mainAzureFunction.bicep file and right click in the tab and select “Deploy Bicep file…”:
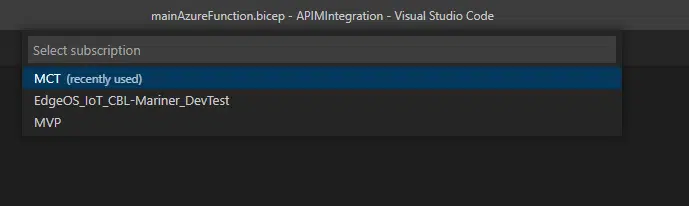
You will see a list of the subscription the user you’ve authenticated with has access to:
Then you’ll get asked which resource group you want to deploy it to, or if you want to create a new one:
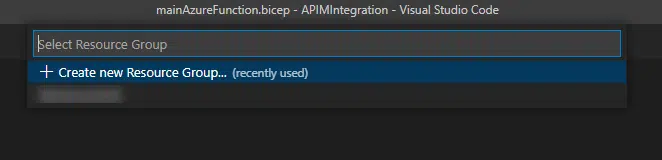
I’ll create a new resource group. When you do this, you will get an additional dialog asking in which region you want to create it from a list.
Then you can select a parameter file, but we’re not using it, so select “None“.
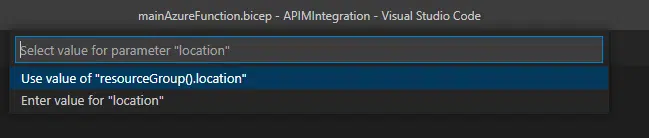
And now we have to select the region where the resources are going to be deployed. Because in the code we’re using the resourceGroup().location value, we see this option in the dialog, but we could use a different one.
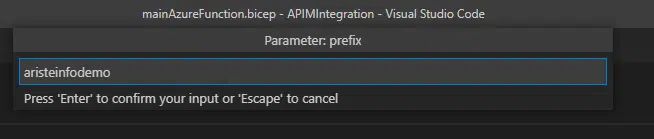
Next we enter the prefix, keep in mind it has to be a unique name:
And finally enter the email and publisher name, your name or domain.
And, finally, a dialog will ask if we want to create a parameter file, select “No”:

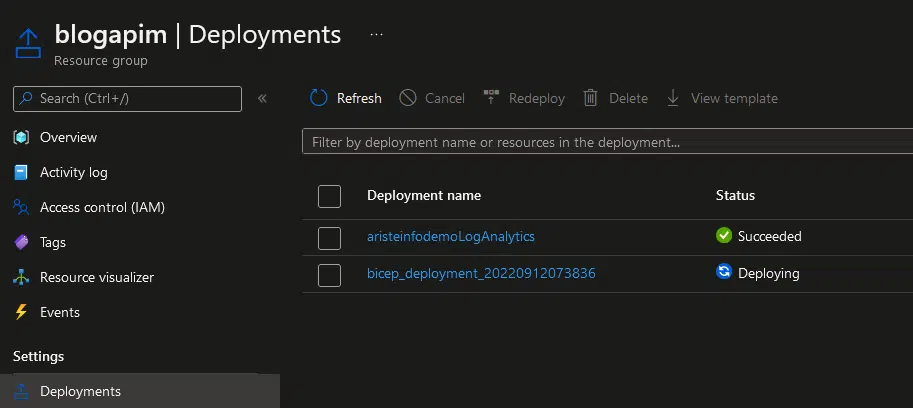
After that we’ll see the message in the output window, and if we want to see the operation status we go to the resource group and “Deployments” option:
It will take a few minutes to deploy everything, and when all it’s done we can go to the overview and see all the resources there:

And just like that, everything is ready to try!
One last cool trick
You may already have noticed this while testing the bicep solution, but when you right-click on the VS Code tab for your main Bicep file, you can select any one of these two options:
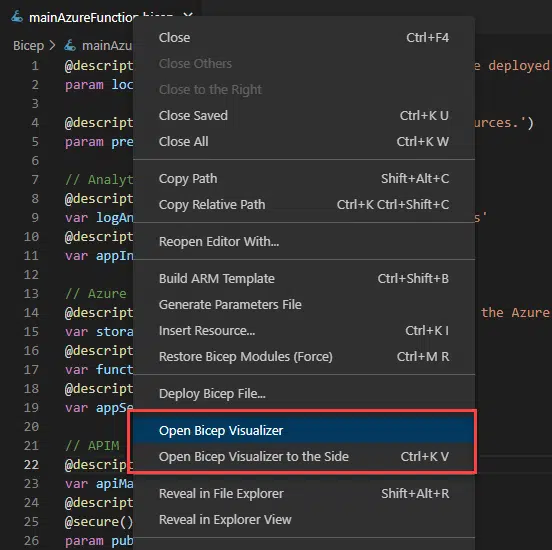
The Bicep Visualizer will open a new tab and show a diagram of the resources, with their icons, and arrows pointing to the relationships between resources.
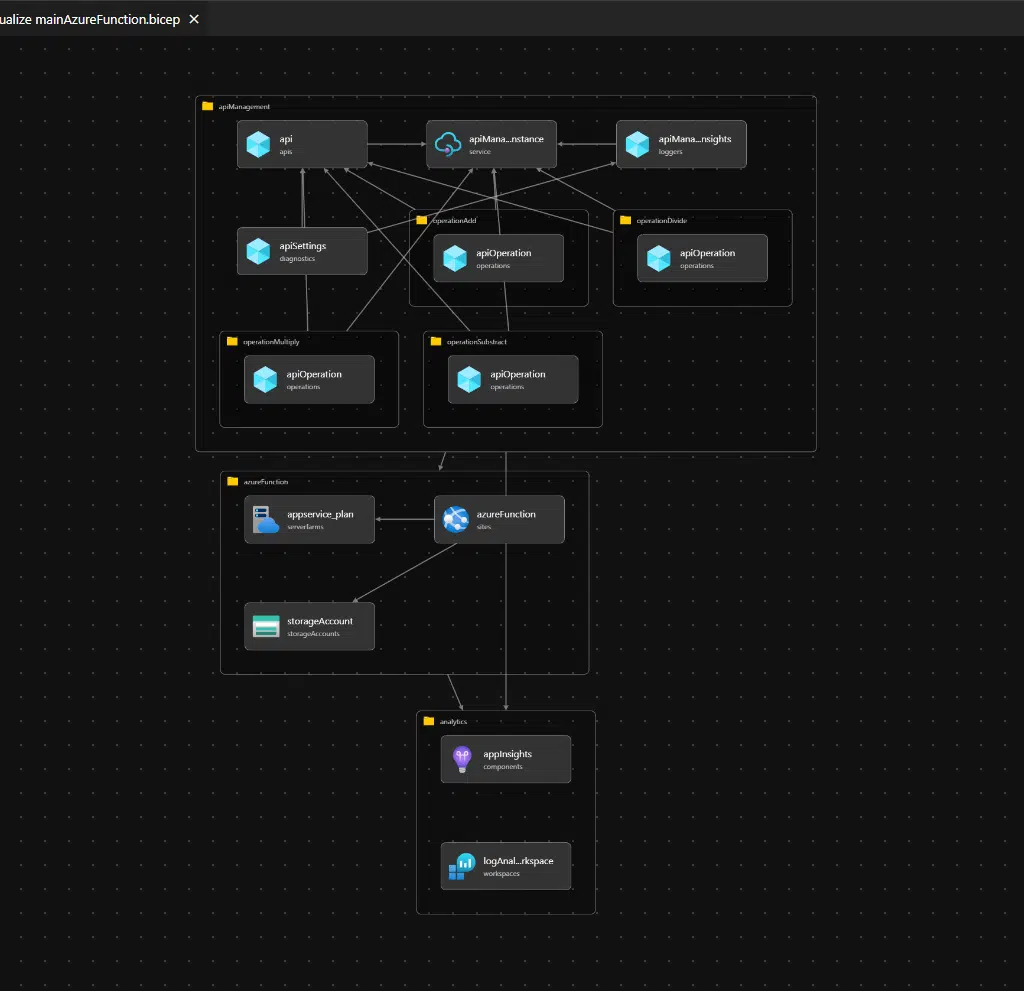
Maybe it’s not that important, but I really like it 😛
Let me insist: if you want to learn more about Bicep, go right now to Microsoft Learn learning paths for Bicep, you don’t even need an Azure subscription because the Learn modules deploy a free sandbox account for you to do the exercises.
And that’s all, I hope this helps you a bit as an introduction to Bicep, and also to deploy the APIM architecture I proposed and try it, and see if it can be helpful for your projects.


3 Comments
Thanks Adria for introducing Bicep, definitely will give it a try.
Thanks for reading it Andrew. I hope it’s useful!
I also use Bicep for deployment of Azure resources and I can fully recommend it.
One more nice trick with Azure functions is providing Open API definition in code. APIM takes it into account when the Azure function is deployed there, which then documents complex types of parameters and return values, shows expected outcomes and such things.