It’s easy to start this post, because many people can ask:
What’s a Data Lake?

A Data Lake is not an Azure product but a term referring to a place where data is stored, regardless of whether it’s structured or unstructured. Its only purpose is storing the data ready to be consumed by other systems. It’s like a lake that stores the water of its tributaries, but instead of water with data.
In Azure the Data Lake is a Blob storage which holds the data. And this data can come from Microsoft Dynamics 365 for Finance or Supply Chain Management (I’ll go crazy with the name changes of Axapta 7) or from other sources.
Currently, and since PU23, #MSDyn365FO (#MSDyn365F ? or #MSDyn365SCM ?) officially supports exporting the Entity Store to Azure Data Lake storage Gen1, but compatibility with Data Lake Storage Gen2 is on the works in a private program with Data Feeds that will allow us to export entities and tables (YES!) in near real time. If you want to know more check the Data Management, Data Entities, OData and Integrations Yammer group in the Insider Program (if you still haven’t joined, you should).
Comparison vs. BYOD
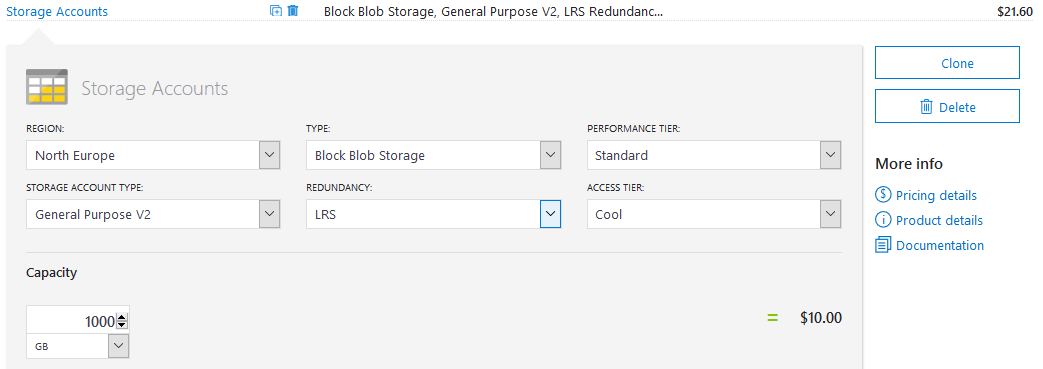
The first thing we must notice is the price. Storage is cheaper than a database, even if it’s a single SaaS DB on Azure SQL. For example, a 1GB Blob storage account on Azure costs $21.6/month.
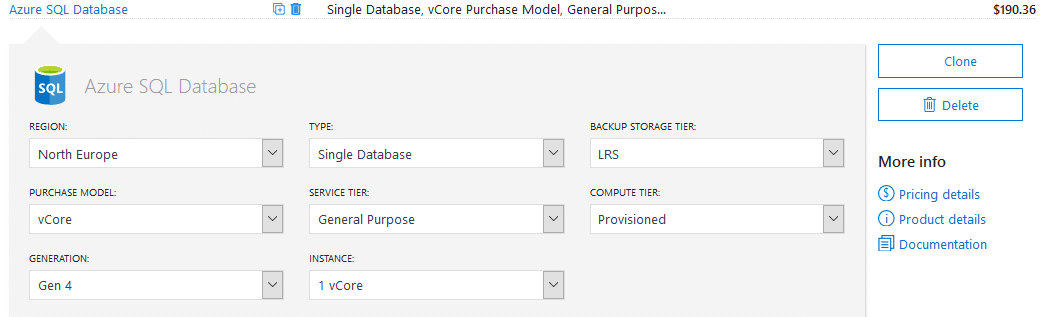
And the simplest Gen 4 with 1 vCore Azure SQL database costs $190.36/month. Almost 10 times more.
And what about performance? This comes from observation, not a real performance test, but data is transferred real fast. And it’s fast because in a Data Lake data is sent raw, there’s no data transformation until it’s consumed (ETL for a DB, ELT for a Data Lake) so there’s less time spent until data reaches its destiny. This doesn’t have a real impact for small sets of data but it does for large ones.
Setup
The process to export the Entity Store to a Data Lake is pretty simple and it’s well documented (but not updated) on the docs. I’ll explain step by step.
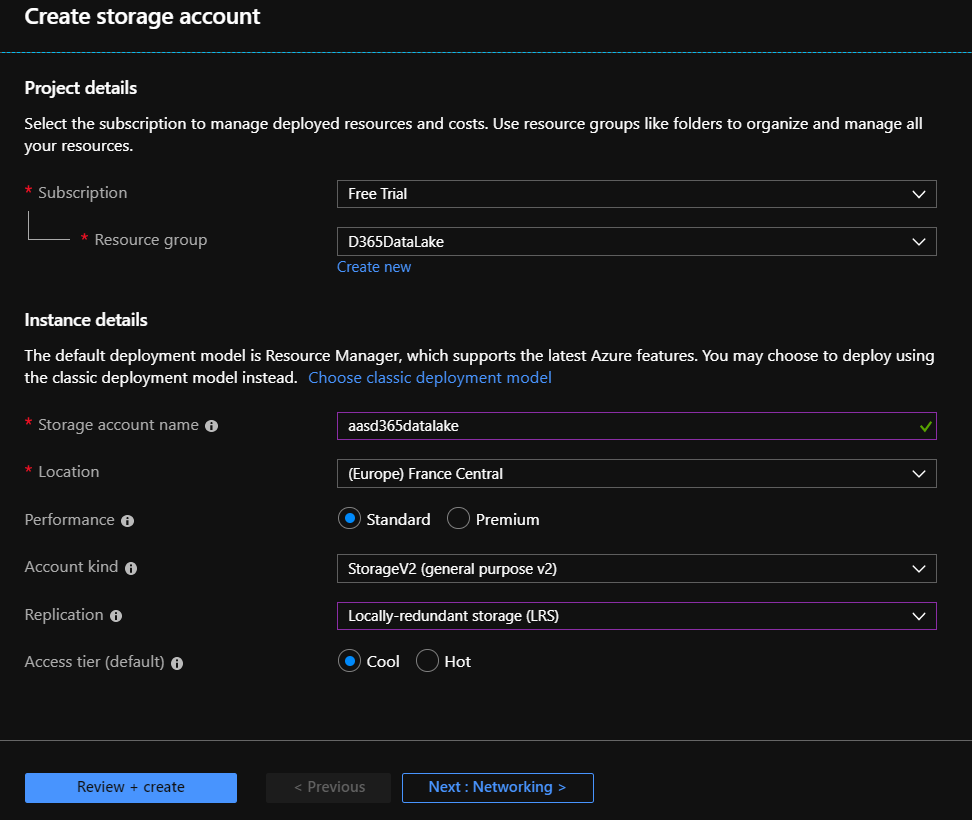
Create a storage account on Azure
On Azure go to or search in the top bar for Storage accounts and add a new one with a setup like the one in the pics below:
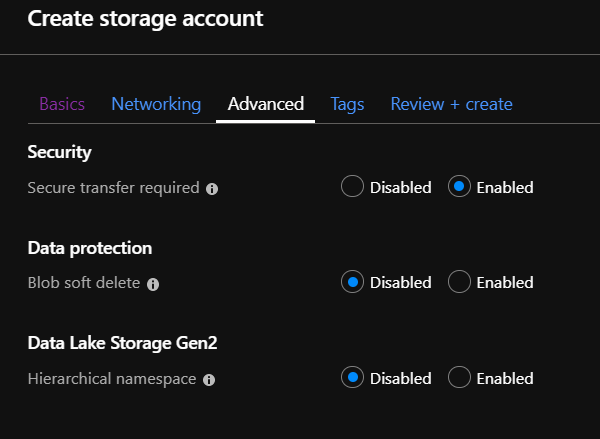
Make sure to disable Gen2 storage:
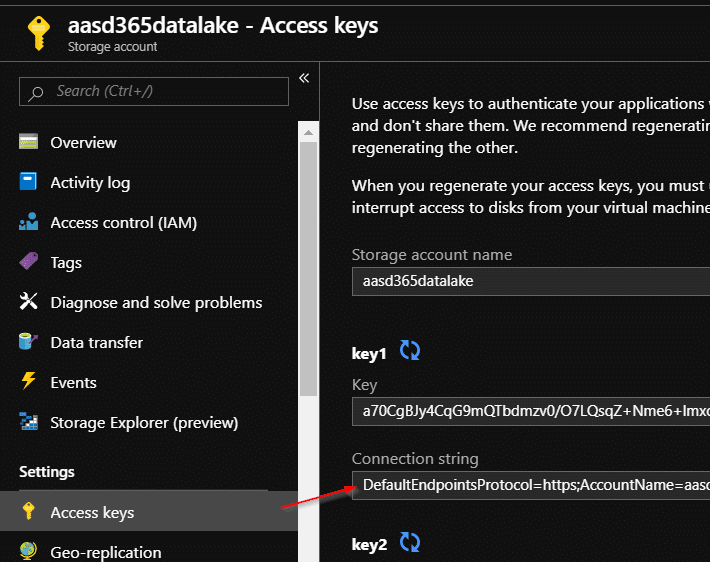
And you can go to review & create. When the account is ready go to Access Keys and copy the connection string:
Azure Key Vault
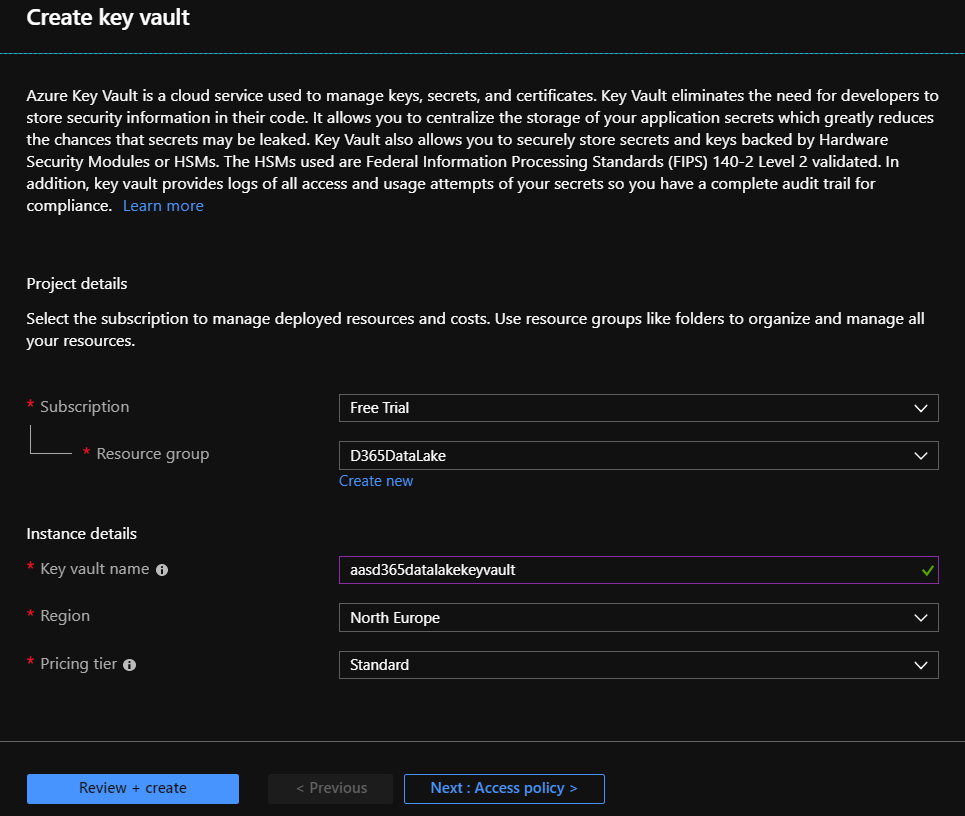
The next step is creating a Key Vault. For this step you need to select the same region as your Dynamics 365 instance:
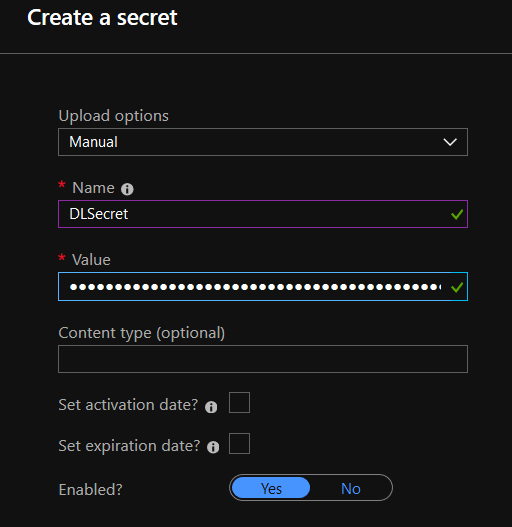
When the Key Vault is ready go to the resource and create a new secret. Paste the connection string from the storage account into the value and press create:
Create an AAD App Registration
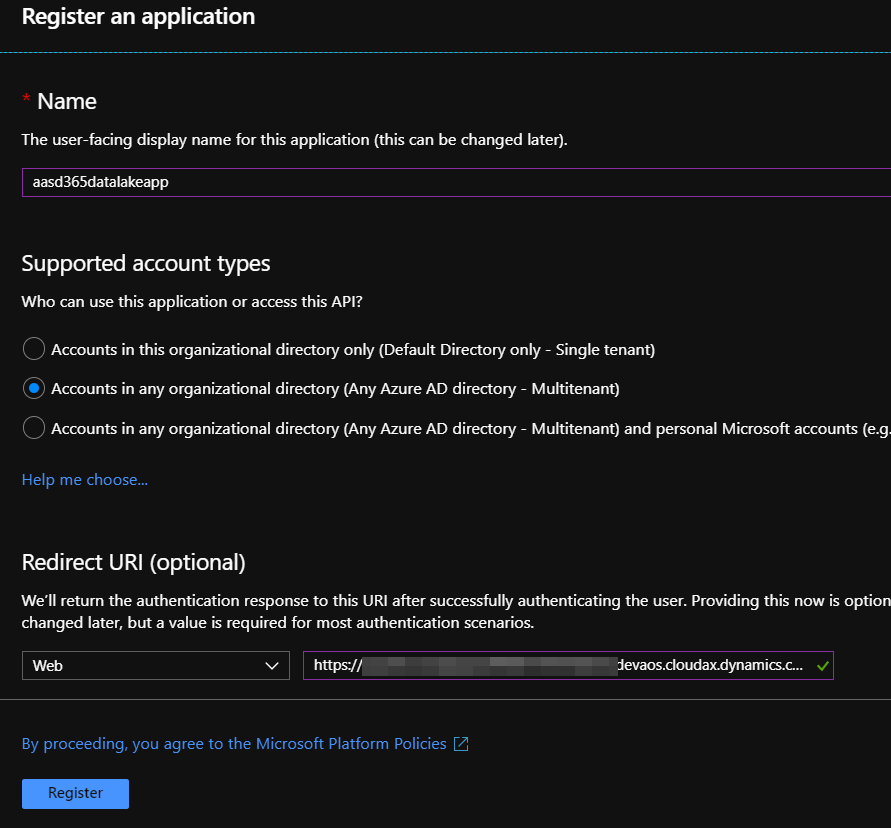
Now we’ll create an AAD App. Give it a name, select the supported account types you need and fill the URL with the base URL of your #MSDyn365FO instance:
Click register and now we must add the Azure Key Vault API to the app as in the image below:
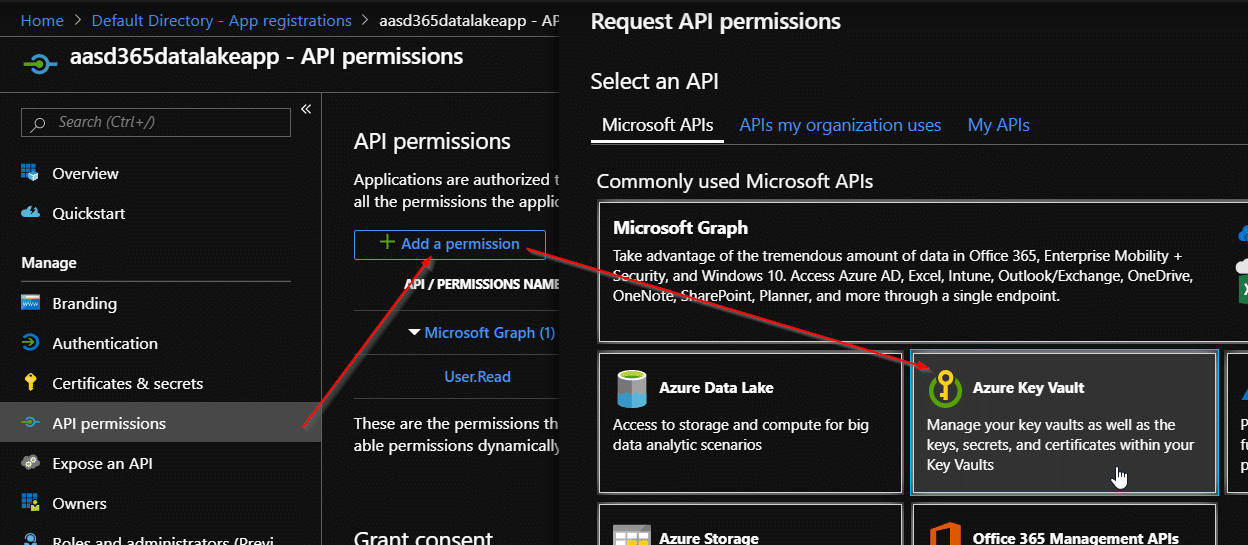
Select the API and add the delegated user_impersonation permission:
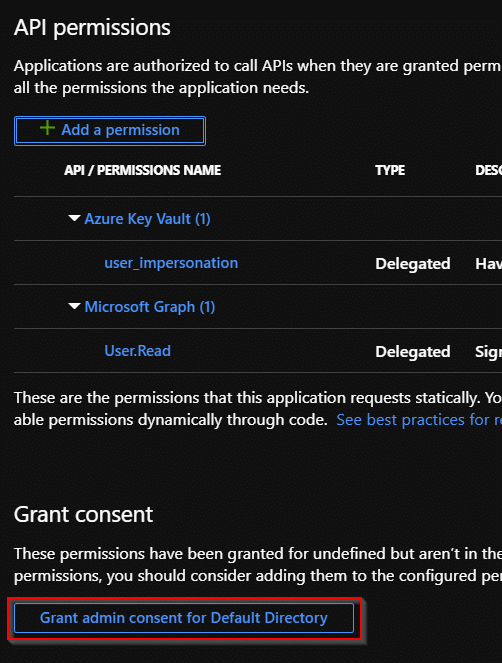
Don’t forget to press the button you can see above to grant privileges (must be done by an Azure admin). Now go to secrets and create a new one, give it a name and copy the secret value. When you close the tab you will not be able to recover that secret anymore so copy it and save it somewhere until we need it.
Setup the Key Vault
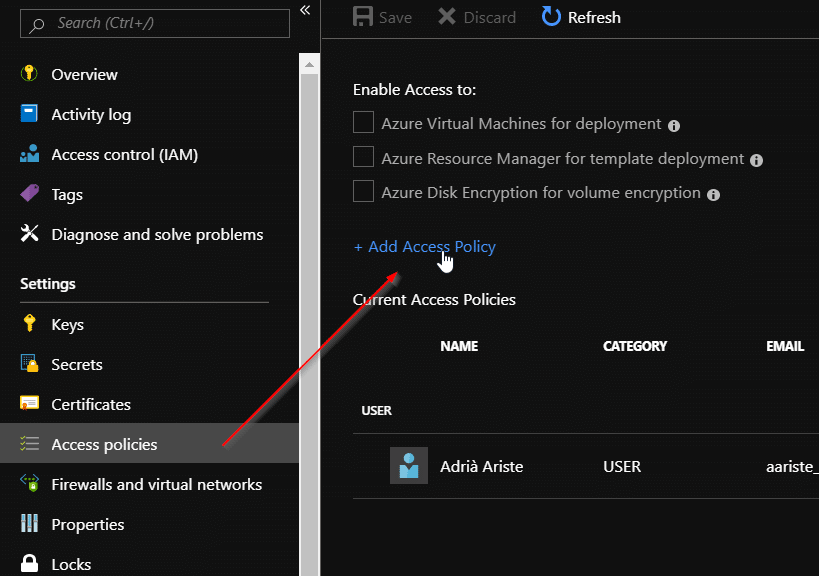
Go back to the Key Vault we created in the second step and go to Access policies. Add a new one:
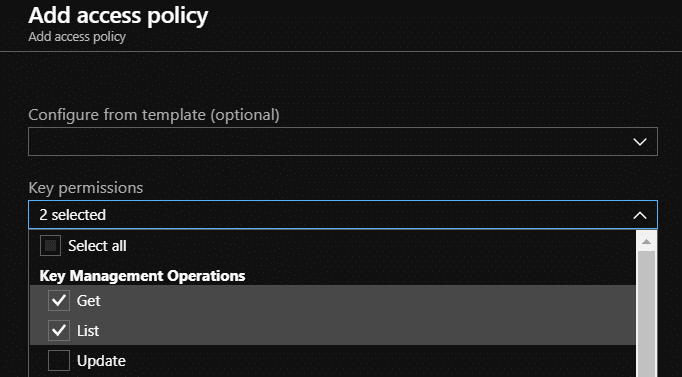
You have to select Get and List for Key and Secret permissions:
Now press Select principal and here add the AAD App created in the third step:
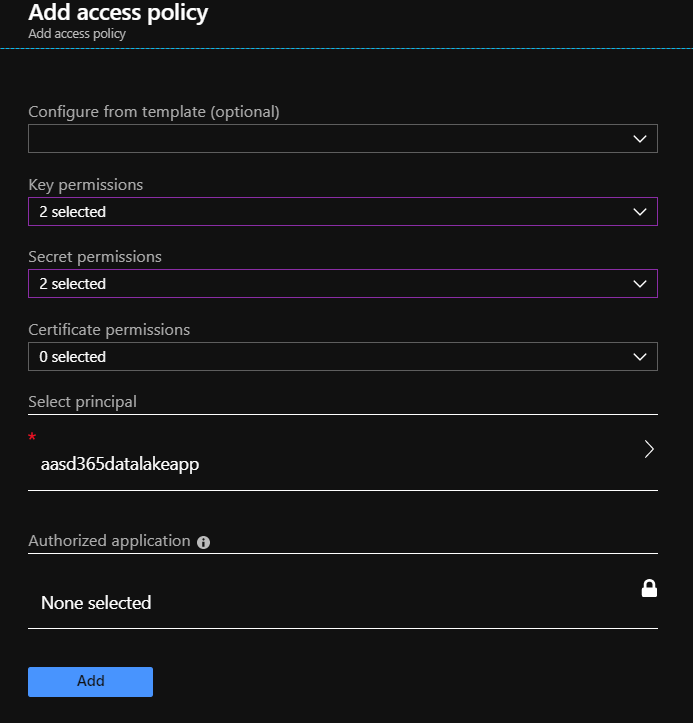
Add it and don’t forget to save in the access policies screen!!
Set up MSDyn365F… and O or and SCM or whatever its name is this month
Navigate to System Administration -> Setup -> System parameters and go to the Data Connections tab. Here there’s 4 fields for the key vault. The Application ID field corresponds to the Application ID of the AAD App (pretty obvious) and the Application Secret is the secret from the AAD App. This part is easy and clear.
The DNS name is the url on your Key Vault and the Secret name field is the name of your Key Vault’s secret where you pasted the storage account connection string.
Once all these fields are complete you can press Test Azure Key Vault and Test Azure Storage and, if you followed all steps correctly, you should see the following messages:

- Enable Data Lake integration: will enable the full push of the entity store to the storage account you have just created and which is the main purpose of this post.
- Trickle update Data Lake: will make updates after data is changed (Trickle Feed).
Setup Entity Store
Now we just need to go to the Entity Store (under System Administration -> Setup -> Entity Store) and enable the refresh of the entities we’d like to hydrate the Data Lake (I love this, it looks like it’s the correct technical word to use when feeding the Data Lake):
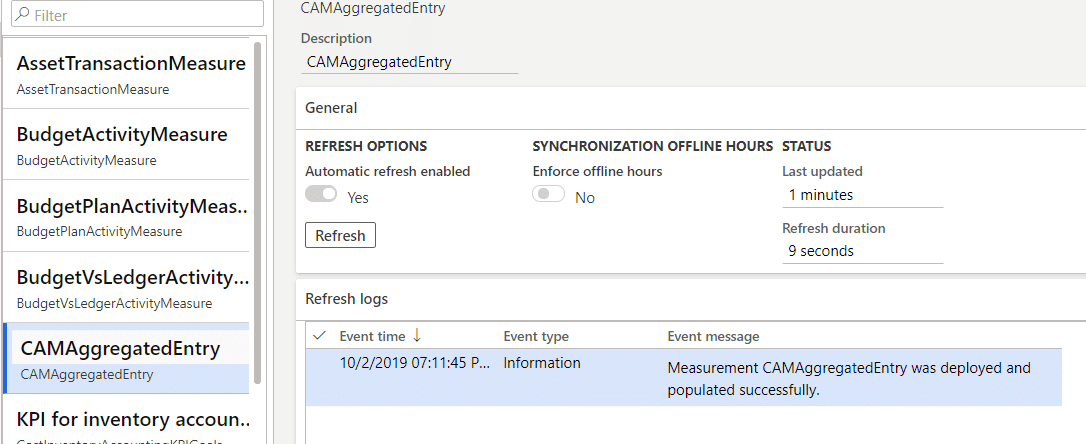
And done, our data is now being pushed to an Azure Blob:

The entities are saved each in a folder, and inside each folder there another folder for each measure of that entity and a CSV file with the data in it.
Now this can be consumed in Power BI with the blob connector, or feed Azure Data Factory or whatever you can think about, because that’s the purpose of the Data Lake.


11 Comments
After we switch to the option to populate the data lake, can the embedded Power BI in D365 still point to AXDW? Do we have an option to continue to use AXDW for embedded Power BI till we are ready to switch it over to Data Lake?
Even after we switch it, I hope we can revert back to AXDW should we so desire.
Am I correct?
I think so, the data is still in the AXDW DB but it’s also pushed to the data lake so you can still use it.
Hi,
I am getting this error “An error occurred while connecting to Azure Key Vault” when I click on “Test azure key vault” and “Test azure storage” button.
For me, the App registration is done by Admin, and the DNS name and secret name is generated and done by my azure Id.
Can you suggest what could be the issue.
Hi Pranav,
it could be either a wrong connection string in the secret or the permissions (Grant consent button) haven’t been correctly applied.
I have followed all the steps correctly, these 2 steps also are correct, should all the steps to be performed with same userId, is it be the issue as in my scenario, the AAD App registration steps are performed by my Admin, and rest of the process (Storage Account and Key Vault Creation ) are performed by my Azure Id.
Thank you Adrià for the detailed explanation. It worked for me 🙂
Is it also possible to import the data from azure data lake into MS Dynamics 365 F&O?
I have a requirement to have both inbound and outbound data loading between azure data lake and MS Dynamics 365 F&O.
Any link or possible ways to import data into D365F&O from azure data lake would be really helpful.
Thank you again,
vm
It can probably be done, but I’m almost sure you’ll need to use Azure Data Factory or something similar to process the data from the Data Lake because it’s just a storage account. If I had to do that I think I’d go with Azure SQL even though the price is considerably higher.
Hi,
Can we enable this feature on Dev box (Tier 1) or this needs tier 2 or higher environment to enable entitystore as datalake feature?
Thanks,
A
Hi Amit,
yes, the entity store export feature can be enabled on a Dev VM.
Not to be confused with the export to datalake integration (which is a different feature) can only be enabled at the moment on Tier 2+ environments.
Regards!