In today’s post I’m going to use the Power Platform and business events to show you how to take the Microsoft Dynamics 365 Finance and Operations Workflow approvals outside MSDyn365FO.
How? Using business events, power automate and adaptive cards to display nice messages in Microsoft Teams.
If you want to know more about using business events in Dynamics 365 you can check these posts from Juan Antonio Tomás:
- Business Events in Finance & Operations
- Developing Business Events with X++
- Consume Business Events from Microsoft Flow
- Tip: Consume Business Events Through Flow in Self-Service Environments
- Business Events: Custom payload part 1, part 2 and part 3
Workflow business events
Workflow business events are not used to replace the standard workflow framework, they actually run along with it, like the alerts business events. For the workflow business events to run, the standard processes must run first, and after the work items are created the work item business events will trigger.
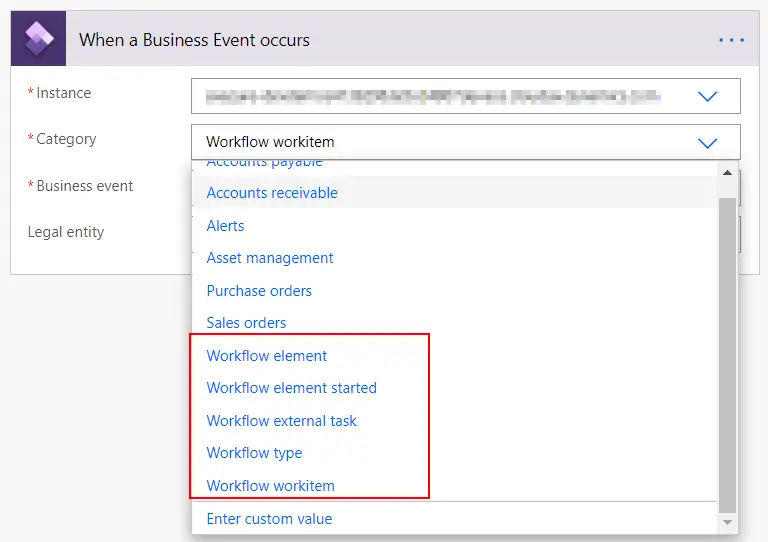
If we create a new Power Automate flow and add a FnO trigger we see can select different workflow categories, depending on what we want to achieve.
In my example we’ll be using the Workflow workitem category. This triggers the flow when a workitem is created.
I will be following this tutorial as a guide, but the approval steps will be done in Teams instead of Dynamics 365.
Power automate flow
How does my flow looks like? It’s something like this:
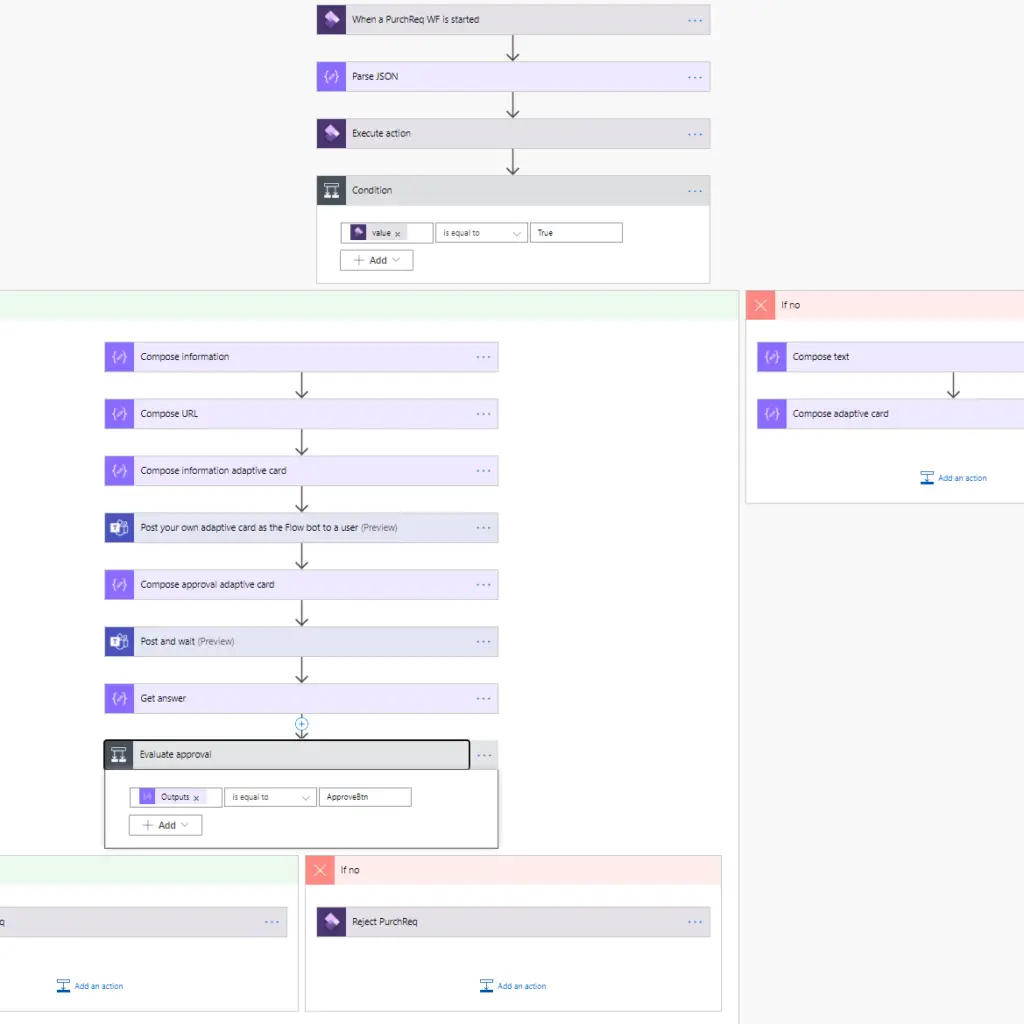
Don’t panic! It’s really simple, it just has many extra steps to make everything pretty. Let’s see what each step does.
Trigger
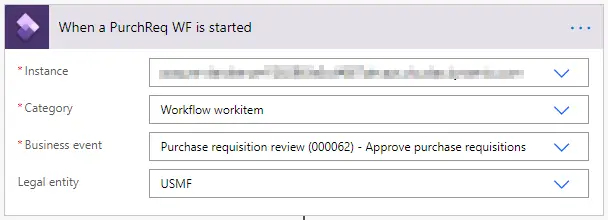
This is our trigger, the step that starts everything, which will fire when a workitem for the workflow Approve purchase requisitions is created.
After the trigger fires we need to parse its output using the Parse JSON action. We need to enter a schema so the parsers knows what to expect and which elements the JSON has. We can download a sample of the JSON from the business events workspace:
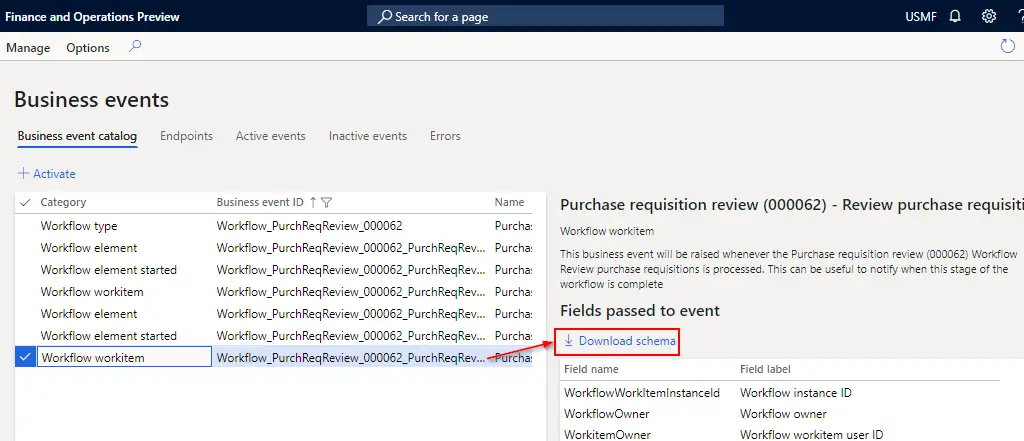
We can use the content of the downloaded file as a sample in flow.
Execute action
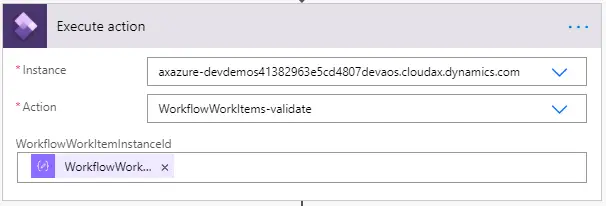
This step will validate that the business event that has triggered the flow is running, has a correct instance id and is waiting for approval.
Then, we will evaluate if it is running, and continue.
Adaptive cards
Now we will create two adaptive cards that will help us display the information in Microsoft Teams in a nice way. What are adaptive cards?
Adaptive Cards are an open card exchange format enabling developers to exchange UI content in a common and consistent way.
Yeah… well, adaptive cards basically are a a way of building an interface to display information in different systems. If you visit its site you’ll see there’s a designer where you can play with them. When you finish creating your adaptive card, you get a JSON that has all of its information. Pushing this JSON to Teams using the connector will display a card with links, images, buttons and whatever you need. Try it!
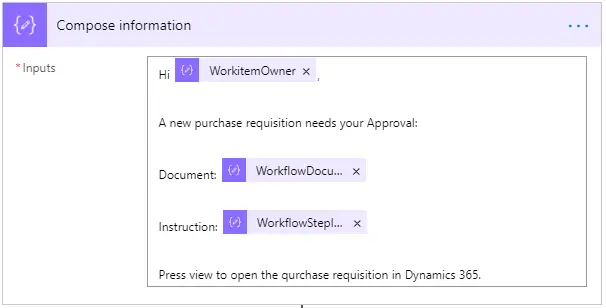
In this step I’m creating a text. Using the information we receive after parsing the business event trigger´s output. This will show the user what he’s been assigned and why.
In the next step I’m just storing the URL that opens the purchase requisition in Dynamics 365.
And finally I compose the adaptive card’s JSON:
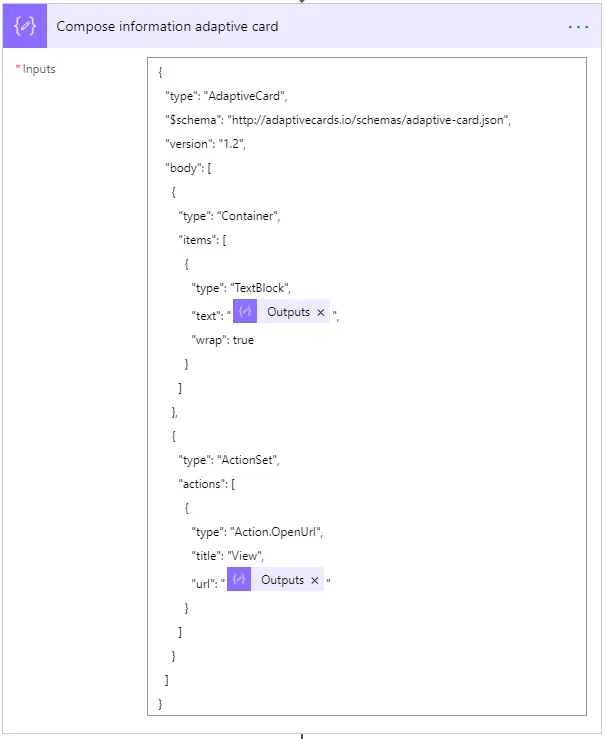
The first Outputs element corresponds to the text I’ll be showing in the card and the second one the URL. This adaptive card has just some text and a View button that opens Dynamics 365.
Why am I taking those extra compose steps? Because sometimes the JSON won’t be generated correctly with all the text put in there. Plus it’s tidier.
In the next step we will post the adaptive card to the user who has the workflow assigned:

In this case the Outputs element is the one from the Compose information adaptive card. How does this card looks like?
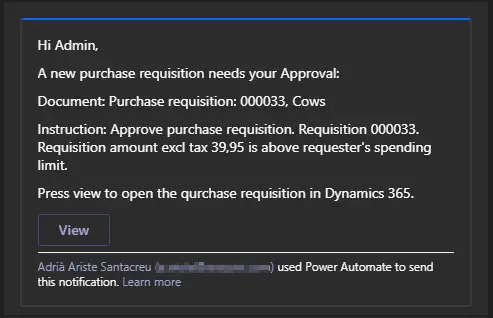
We can see the purchase requisition number and why it needs an approval. And we can open the purchase requisitions form inside Dynamics 365 using the View button.
Approval
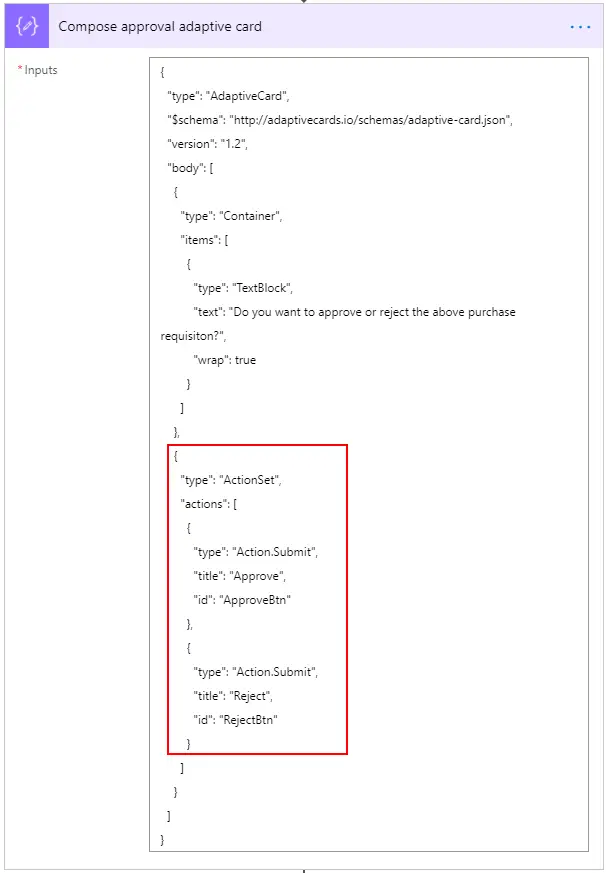
After showing the information to the user we ask for an action with the adaptive card on the left.
You can see it has an action set with two actions: Approve and Reject.
Otherwise it’s a very simple adaptive card that only show a text that reads “Do you want to approve or reject the above purchase requisition?”.
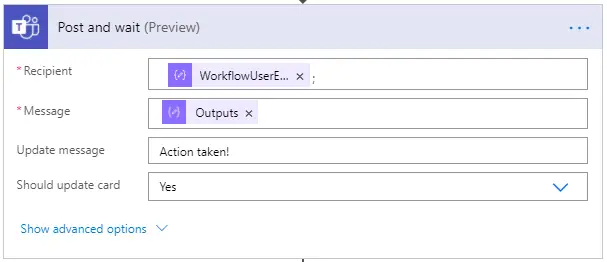
Next we post this as an adaptive card and wait for an answer:
And this card will look like this:
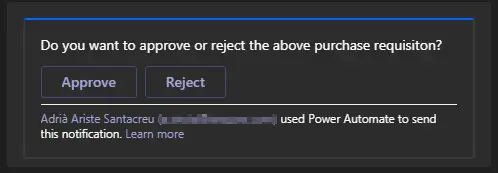
Just an Approve and Reject button.
And now comes the tricky part. This action is in preview and it’s output isn’t shown on the next step because… I don’t know why, the preview? But it has an easy fix which I learned in this video from Mar Llambí. We just need to add another compose and in its expression we will write outputs(‘Post_and_wait’)?[‘body’]?[‘submitActionId’], where Post_and_wait is the name of the action above.
Then we can evaluate which button has been pressed and approve or reject the workitem:
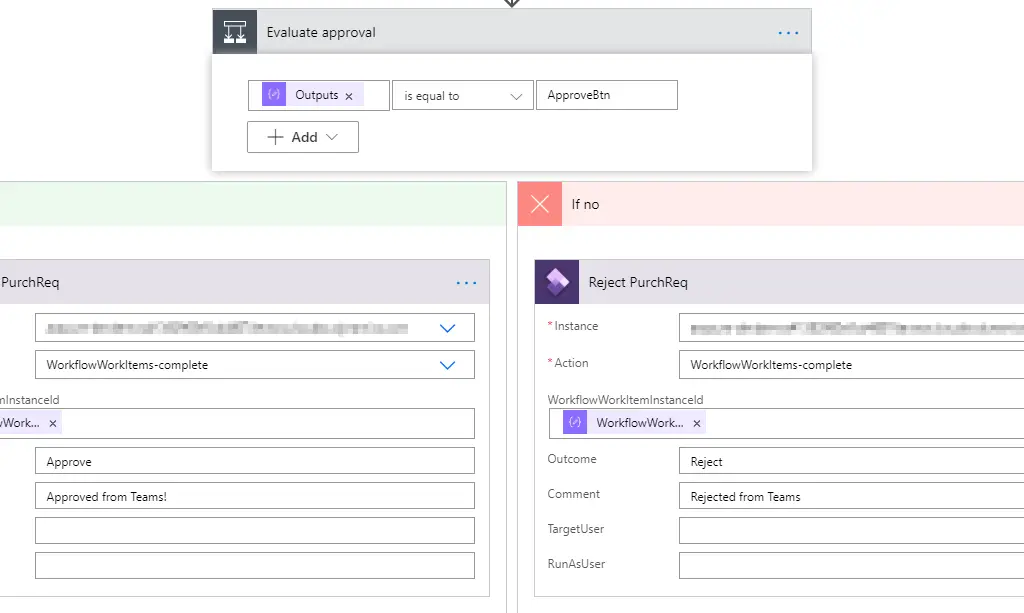
And done! If we go to the workflow history we will see the approval message in the workitem:

Conclusion
As I’ve said other times and I wanted to show with my PatatApp, we can use the Power Platform with Dynamics 365 for Finance and Operations. It’s getting better every day and offers plenty of solutions that allow us to change the standard FnO’s functionality. And it can be done in just a little time!
Go and try it!





4 Comments
Thank you for this deep explanation.
I did not try your solution yet. But, I already tried the powerapp in relation with FinOps for approval (example made with Project Timesheet, and Expenses).
2 thoughts on this :
– I do not have any gain from a perspective license. As I still need a user finops license for the person who approves. Do you agree with this ?
– I used a teams bot to do the approvals
But the approvals request remains in the discussion, even where the approval request is treated. Which is so-so… do you encounter the same ?
You just gain a new follower 🙂 !
Regards
Hi Lionel,
from a license point of view I think you’re right. I’m not someone that knows a lot about licensing (and it’s so confusing I think never will) but as the workflow still “lives inside” FnO and the workflow users are Dynamics 365 users they need a license. Whether it’s a full or team member or activity… I’m lost.
And regarding the approval I’ve used adaptive cards and they have an option where you can make the card change to a “Done” status instead of the Approve/Reject buttons status so you know the action has been taken (and cannot do it more than once).
Thanks for reading and following!