In a past post, we learned how to create custom data entities to be used in Dual-write.
And now you might be asking yourself, how do I move the Dual-write table mappings to a test or production environment from the development environment? Do I need to repeat everything I’ve done on the dev machine in a Sandbox environment?
Fortunately, we don’t need to do it all manually again, we can use a Dataverse solution to copy the Dual-write table mappings between environments.

If you want to learn more about Dual-write you can:
- Read the docs which have plenty of information. Read the docs. Always.
- Guidance for Dual-Write setup
- System requirements and prerequisites
- Watch some of Faisal Fareed‘s sessions about Dual-write: DynamicsCon 2020: The Power of Dual-write or Scottish Summit 2021: D365 FO integration with Dataverse – Dual write, Virtual Entities, OR Data Integrator. He’s got some more which you can find on Youtube.
Customize Dual-write table mappings
Imagine we’re adding a new operating unit type to the Operating unit entity:

We add the new value to the transform and click the save button on the dialog. Then we need to click the “Save as” button on the top bar:

Select the publisher, fill in the version number you want, and you can also add a description, which is pretty useful when selecting different Dual-write table mapping versions as we’ll see later.
Once it’s saved we can go to the main Dual-write screen and we can see that the table mapping has the version we’ve just created:

Dataverse solutions
Now we need to go to https://make.powerapps.com, and before doing anything else make sure the active Dataverse environment is the one that’s linked to the Finance and Operations instance.
Create and export solution
And now we’ll create a new solution:

Give it a name, select the same publisher as the one you’ve set in your customized Dual-write table mappings, and also a version number, and click “Create”:

Select our new solution and click on the “Add existing” button, then scroll down to the “Other” submenu and select “Dual-write table map”:

Now a new dialog will open with all the Dual-write table mappings on our current Dataverse environment:

Select all the table mappings you want to move to the new Dataverse environment and click “Add”. Then we select our solution and click “Export”:

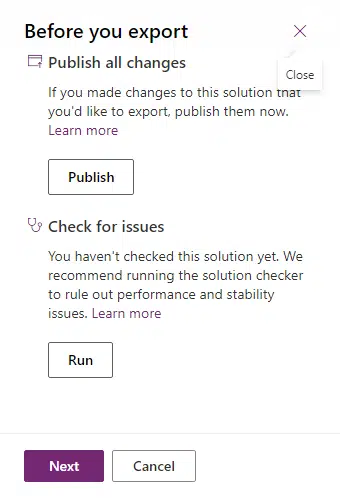
The wizard, first of all, will ask us if we want to publish the solution, and we will before continuing with the export. The reason to publish first is that some changes couldn’t be applied if the solution isn’t published first (thanks to my colleague Victor Sánchez for explaining this to me!):

Then we click “Next”, and export the solution as “Managed”:

The solution will start exporting and when it’s ready a ZIP file will be downloaded to your PC.
Import solution
Change the Dataverse environment to the target environment where you want to import the mappings, go to the “Solutions” section and click the “Import” button:

Browse and select the exported solution, then click “Next” and “Import”:


The import process takes some time, when it’s done you’ll see your solution in the target Dataverse environment:

Now go to your Finance and Operations target environment Dual-write page and click the “Apply solution” button:

You will see the standard Dual-write table mappings and all the solutions that contain mappings. Select yours and click “Apply”:

And our new Dual-write table mappings will be ready on the FnO target environment!
Table map versions
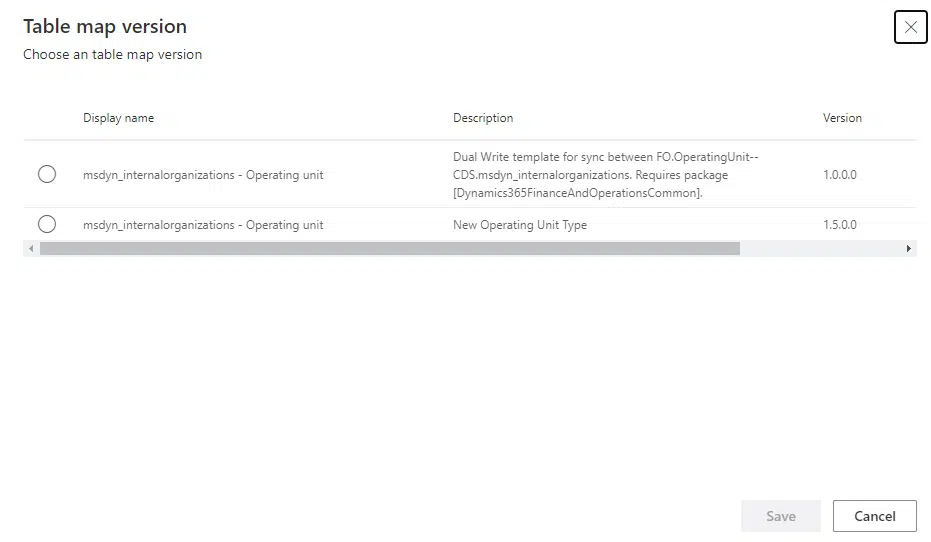
It’s possible that after importing you still won’t see your version in the table mapping. You can select the mapping and either click on the “Table map version” button or the link on the right of the Dual-write table mapping name:

In the dialog that will open you will see all the versions you have created each time you’ve used the “Save as” button, and you can select the version that you want to enable:

And we’re done! Or we may not…
Some remarks
It’s possible that after importing the solution the mappings won’t run on the target environment. Some causes could be:
- Missing integration key for new entities.
- The data entities need to be refreshed on the target environment or even added to the entity list manually.
- As I said earlier, you need to change the Dual-write table mappings versions to use the one you’ve imported.
But other than this you should be perfectly fine. This is something Finance and Operations developers probably have never done especially the part of the Dataverse solutions, I hope I can help somebody with this post!
And remember that the convergence is coming, and we need to start thinking about the Power Platform as a tool that will complement Dynamics 365 Finance and Operations. And not only complement it, but Power Platform Admin Centre (PPAC) will also replace LCS in a few months! Fun times ahead of us!


5 Comments
Thanks for describing the process, the official documentation is a bit light on the details. Let’s hope Microsoft streamlines this process in the future so it has less steps and can be fully automated.
Thank you for reading Florian. Yes, the docs sometimes miss some more detailed instructions…