You can read my complete guide on Microsoft Dynamics 365 for Finance & Operations and Azure DevOps.
Let’s go…
Some weeks ago, the release pipeline extension for #MSDyn365FO was published in Azure DevOps Marketplace, taking us closer to the continuous integration scenario. While we wait for the official documentation we can check the notes on the announcement, and I’ve written a step by step guide to set it up on our projects.
To configure the release pipeline, we need:
- AAD app registration
- LCS project
- An Azure DevOps project linked to the LCS project above
- A service account
I recommend the user to be a service account with a non-expiring password and enough privileges on LCS, Azure and Azure DevOps (well, this is not a recommendation, without rights this cannot be done). This is not mandatory and can be done even with your user (if it has enough rights) for testing purposes.
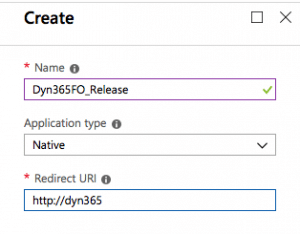
AAD app creation
The first step to take is creating an app registration on Azure Active Directory to upload the generated deployable package to LCS. Head to Azure portal and once logged in go to Azure ActiveDirectory, then App Registrations and create a new Native app:
Next go to “Settings” and “Required permissions” to add the Dynamics Lifecycle Services API:
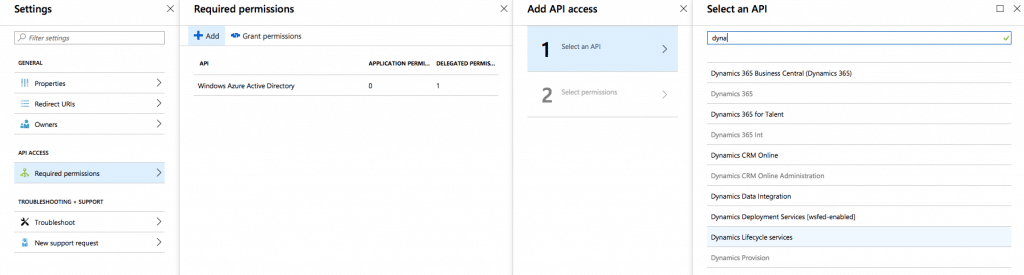
Select the only available permission in step 2 and accept until it appears on the “Required permissions” screen. Finally push the “Grant permissions” button to apply the changes:
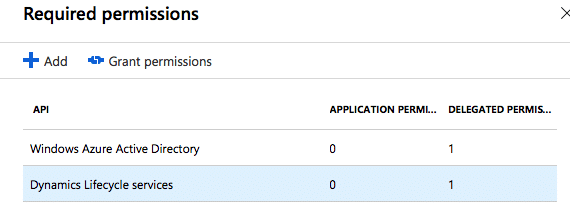
This last step can be easily forgotten and the package upload to LCS cannot be done if not granted. Once done take note of the Application ID, we’ll use it later.
Create the release pipeline in DevOps
Before setting up anything on Azure DevOps we need to make sure the project we’re going to use is linked to LCS. This can be done in the “Visual Studio Team Services” tab in LCS’ project settings.
After setting it up, we’ll go to Pipelines -> Releases to create the new release. Select “New release pipeline” and choose “Empty job” from the list.
On the artifact box select the build which we will link to this release definition:
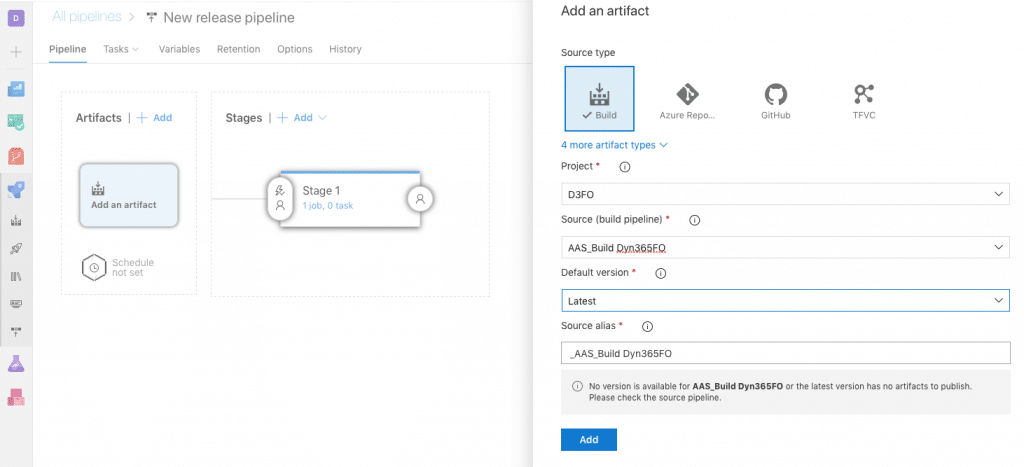
Pick the build definition you want to use for the release in “Source”, “Latest” in “Default version” and push “Add”.
The next step we’ll take is adding a Task with the release pipeline for Dynamics. Go to the Tasks tab and press the plus button. A list with extension will appear, look for “Dynamics 365 Unified Operations Tools”:
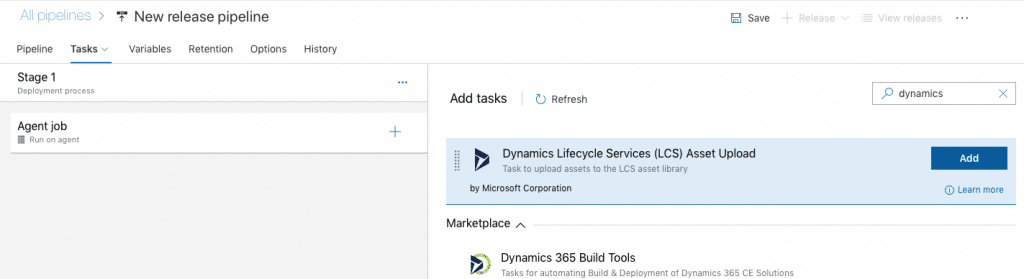
If the extension hasn’t been added previously it can be done in this screen. In order to add it, the user used to create the release must have admin rights on the Azure DevOps account, not only in the project in which we’re creating the pipeline.
When the task is created we need to fill some parameters: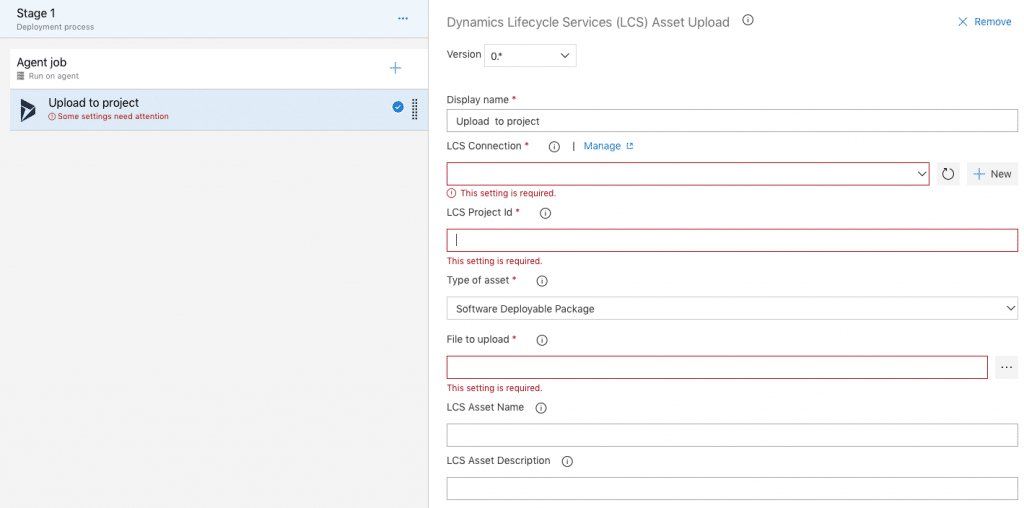
Creating the LCS connection
The first step in the task is setting up the link to LCS using the AAD app we created before. Press New and let’s fill the fields in the following screen:
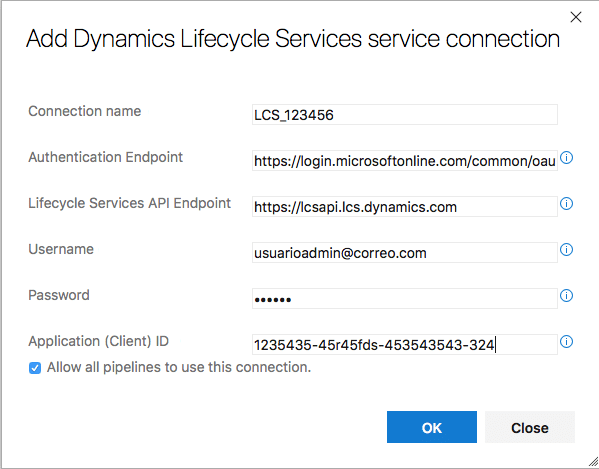
It’s only necessary to fill in the connection name, username, password (from the user and Application (Client) ID fields. Use the App ID we got in the first step for the App ID field. The endpoint fields should be automatically filled in. Finally, press OK and the LCS connection is ready.
In the LCS Project Id field, use the ID from the LCS project URL, for example in https://lcs.dynamics.com/V2/ProjectOverview/1234567 the project is is 1234567.
Press the button next to “File to upload” and select the deployable package file generated by the build:
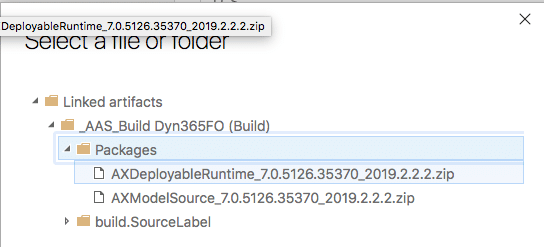
If the build definition hasn’t been modified, the output DP will have a name like AXDeployableRuntime_VERSION_BUILDNUMBER.zip. Change the fixed Build Number for the DevOps variable $(Build.BuildNumber) like in the image below:

The package name and description in LCS are defined in “LCS Asset Name” and “LCS Asset Description”. For these fields, Azure DevOps’ build variables and release variables can be used. Use whatever fits your project, for example a prefix to distinguish between prod and pre-prod packages followed by $(Build.BuildNumber), will upload the DP to LCS with a name like Prod 2019.1.29.1, using the date as a DP name.
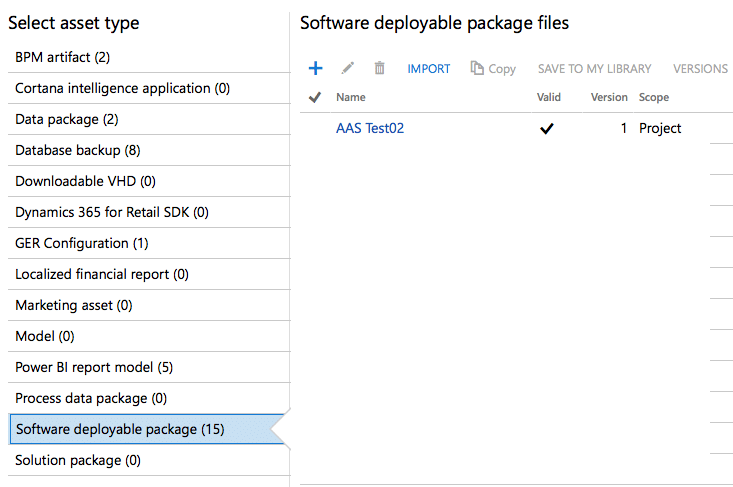
Save the task and release definition and let’s test it. In the Releases select the one we have just created and press the “Create a release” button, in the dialog just press OK. The release will start and, if everything is OK we’ll see the DP in LCS when it finishes:
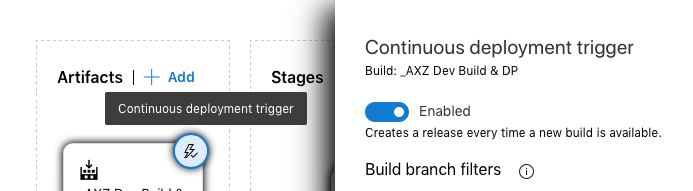
The release part can be automated, just press the lightning button on the artifact and enable the trigger:
And that’s all! Now the build and the releases are both configured. Once the deployment package is published the CI scenario will be complete.


9 Comments
Hi Followed your article step by step. Upon running the release pipeline, I am getting the below error:
2021-02-01T12:26:56.9497042Z ##[error]AADSTS7000218: The request body must contain the following parameter: ‘client_assertion’ or ‘client_secret’.
Check your Azure App Registration, try adding the Dynamics ERP delegated permissions and granting consent (an admin must do this) also try setting the App as a public endpoint.
Hi Abdul, if you set the allow public client flows to true, (under the authentication of the app), this issue will be gone.
Hi Abdul, I have followed your steps, Im getting the error “2021-11-26T15:16:20.2465272Z ##[error]Leaf path not found: ‘D:\a\r1\a\_xxxxxx_BuildPipeine\Packages\AXDeployableRuntime_21.11.24.1.zip'”