You can read my complete guide on Microsoft Dynamics 365 for Finance & Operations and Azure DevOps.
I’ve already written some posts about development Application Lifecycle Management (ALM) for Dynamics 365 for Finance and Operations in the past:
- Dynamics 365 for Finance & Operations and Azure DevOps (part I)
- Dynamics 365 for Finance & Operations and Azure DevOps (part II)
- Setting up Release Pipeline in Azure DevOps for Dynamics 365 for Finance and Operations
- Set up the new Azure DevOps tasks for Packaging and Model Versioning
The possibility of doing real CI/CD is one of my favorite MSDyn365FO things, going from “What’s source control?” to “Mandatory source control or die” has been a blessing. I’ll never get tired of saying this.
Plus the post ends with an extra bonus!
More automation!
I’ve already explained in the past how to automate the builds, create the CI builds and create the release pipelines on Azure DevOps, what I want to talk about in this post is about adding a little bit more automation.
Builds
In the build definition go to the “Triggers” tab and enable a scheduled build:
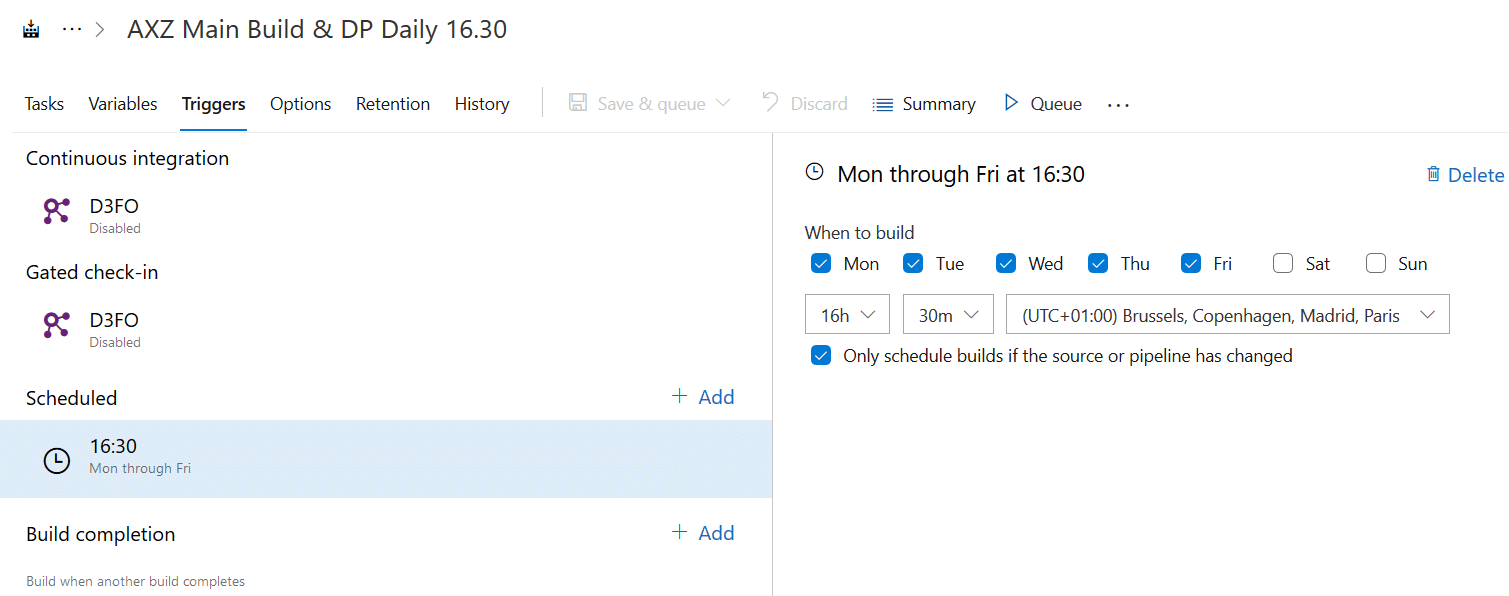
This will automatically trigger the build at the time and days you select. In the example image, every weekday at 16.30h a new build will be launched. But everyday? Nope! What the “Only schedule builds if the source or pipeline has changed” checkbox below the time selector makes is only triggering the build if there’s been any change to the codebase, meaning that if there’s no changeset checked-in during that day no build will be triggered.
Releases
First step done, let’s see what can we do with the releases:
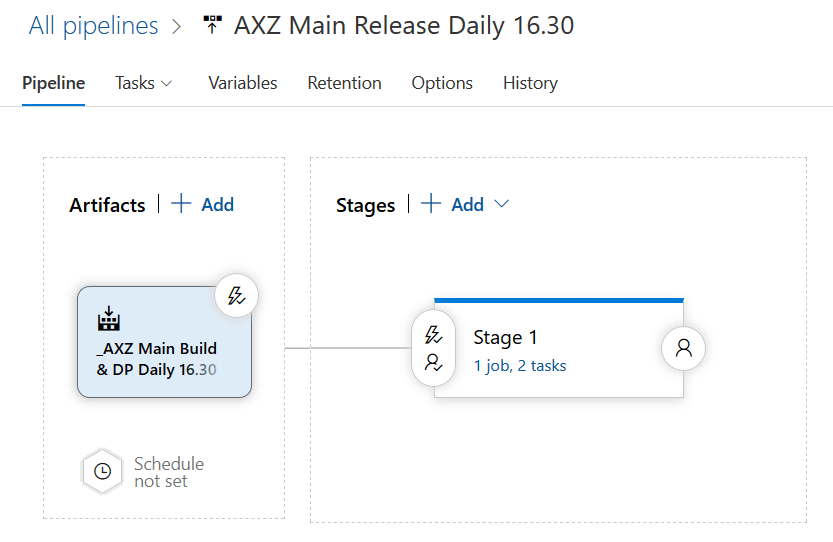
The release pipeline in the image above is the one that launches after the build I’ve created in the first step. For this pipeline I’ve added the following:
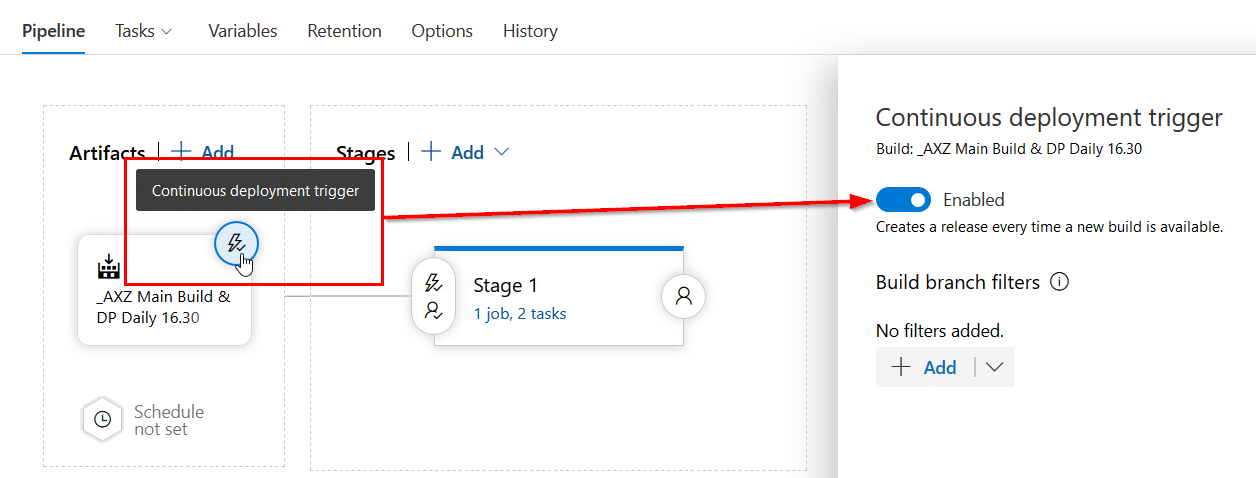
The continuous deployment trigger has been enabled, meaning that after the build finishes this release will be automatically run. No need to define a schedule but you could also do that.
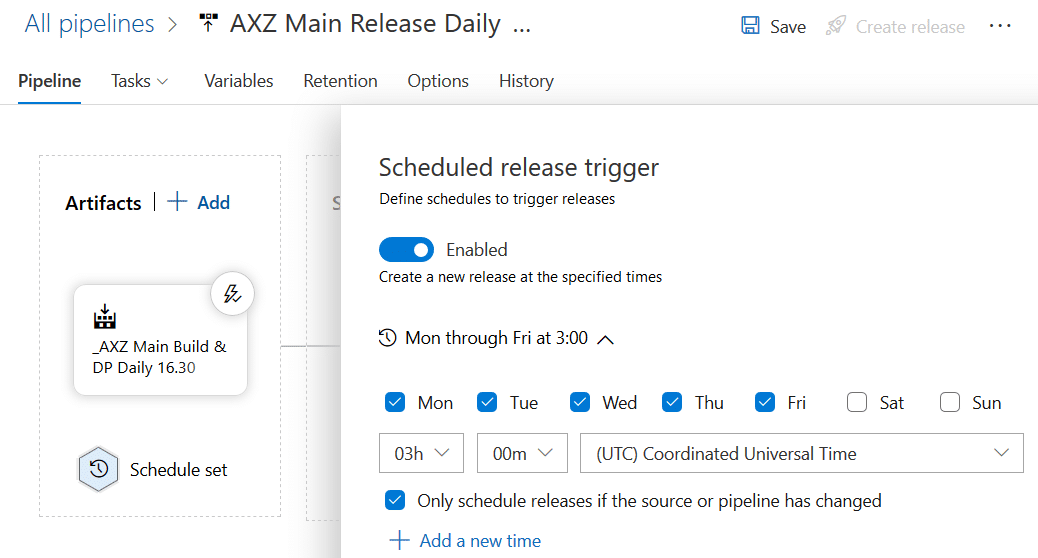
As you can see, the schedule screen is exactly the same as in the builds, even the changed pipeline checkbox is there. You can use any of these two approaches, CD or scheduled release, it’s up to your project or team needs.
With these two small steps you can have your full CI and CD strategy automatized and update a UAT environment each night to have all the changes done during that day ready for testing, with no human interaction!
But I like to add some human touch to it
If you don’t like not knowing if an environment is being updated… well that’s IMPOSSIBLE because LCS will SPAM you to make sure you know what’s going on. But if you don’t want to be completely replaced by robots you can add approvals to your release flow:
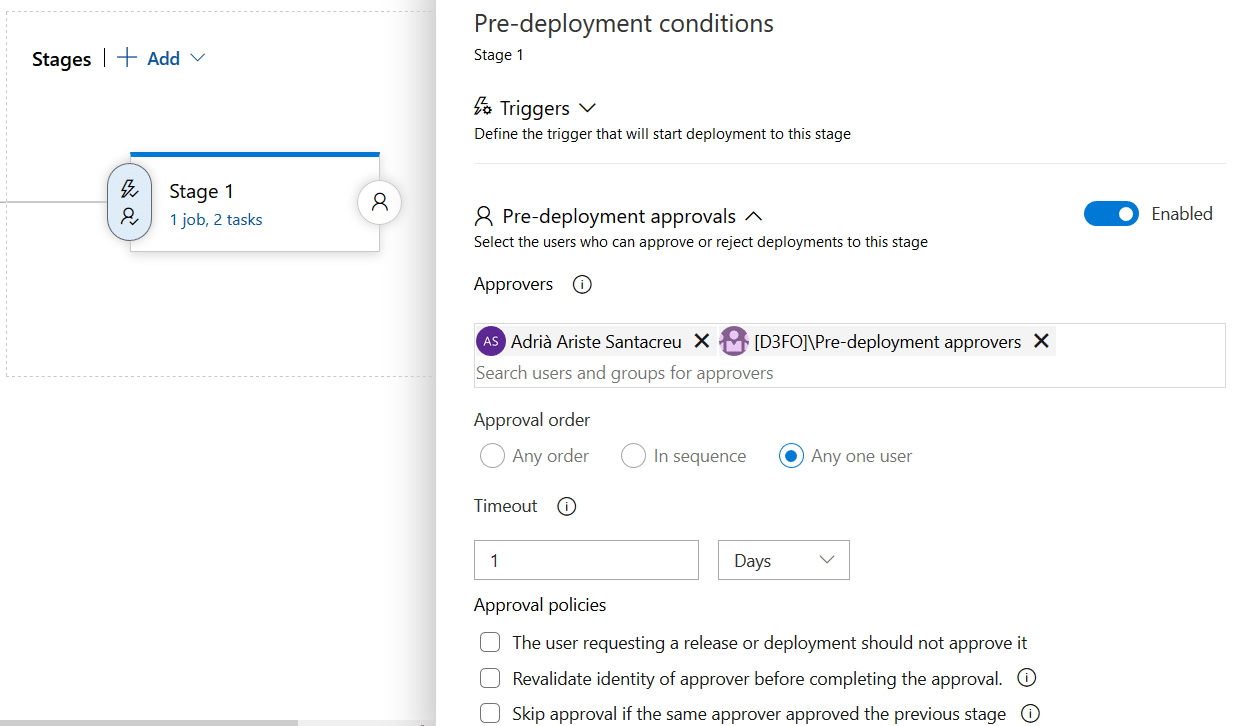
Clicking the left lightning + person button on your release you can set the approvers, a person or a group (which is quite practical), and the kind of approval (all or single approver) and the timeout. You will also receive an email with a link to the approval form:
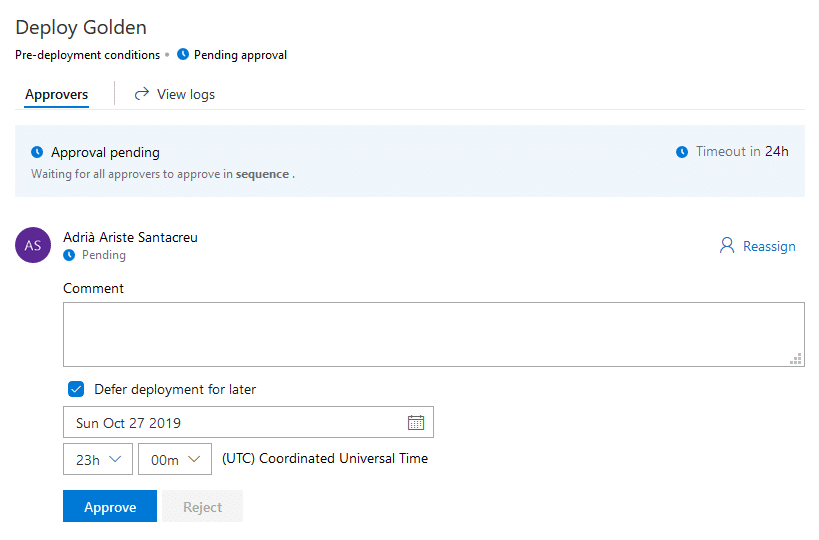
And you can also postpone the deployment! Everything is awesome!
Extra bonus!
A little tip. Imagine you have the following release:
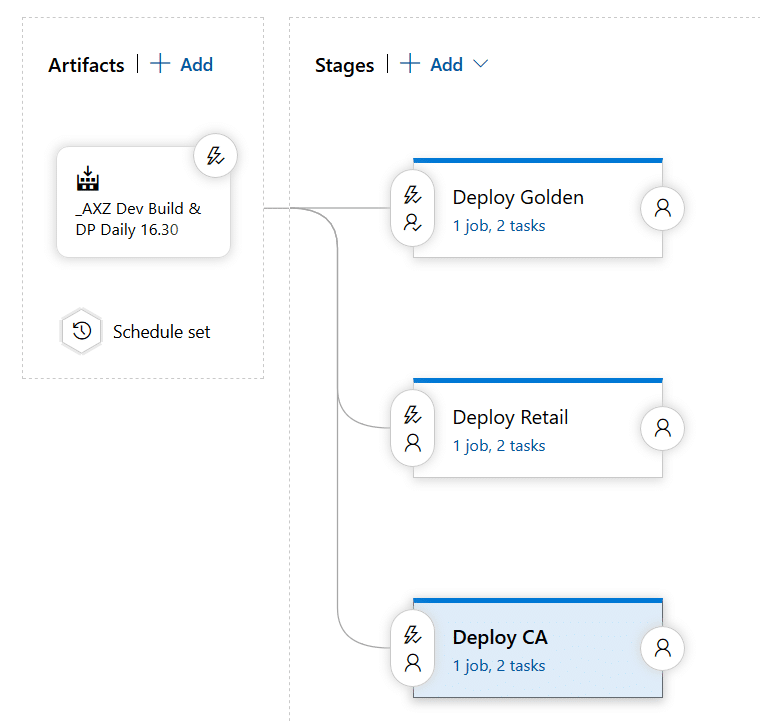
This will update 3 environments, but will also upload the same Deployable Package three times to LCS. Wouldn’t it be nice to have a single upload and that all the deployments used that file? Yes, but we can’t pass the output variable from the upload to other stages 🙁 Yes that’s unfortunately right. But we can do something with a little help from our friend Powershell!
Update a variable in a release
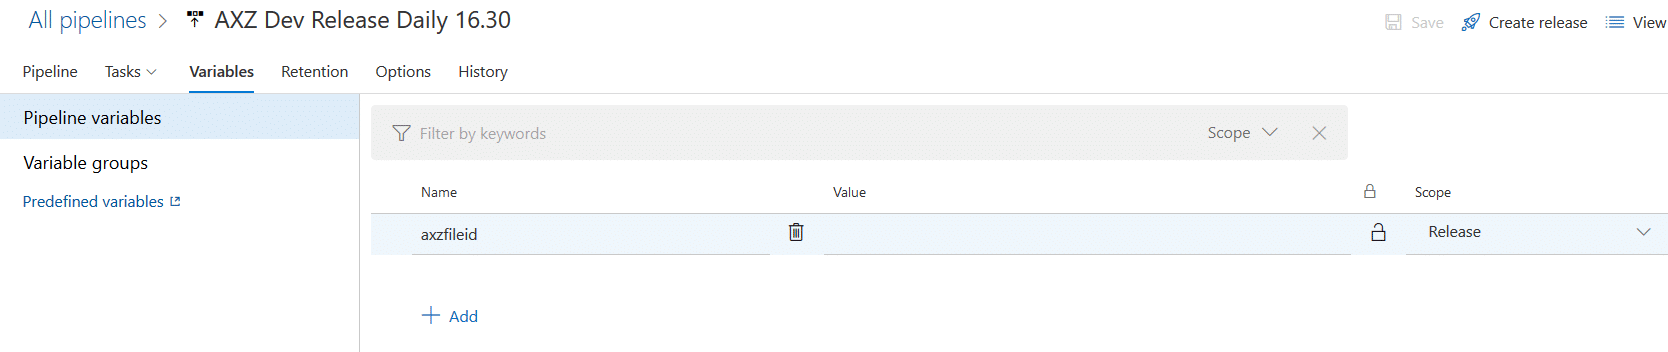
What we need to do is create a variable in the release definition and set its scope to “Release”:
Then, for each stage, we need to enable this checkbox in the agent job:
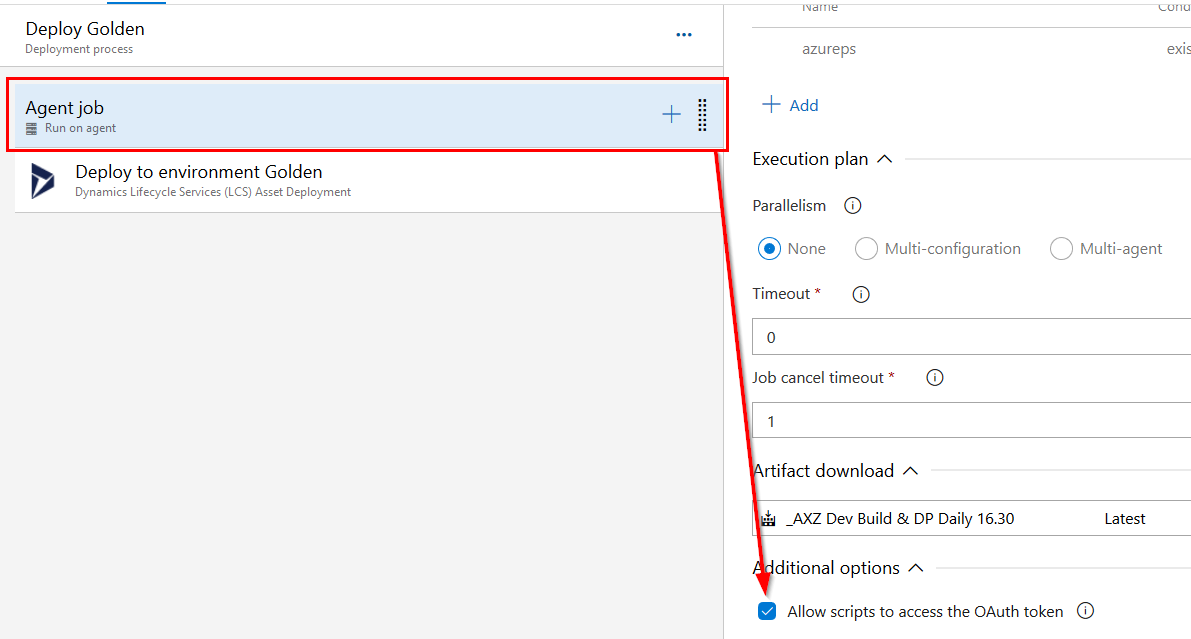
I explain later why we’re enabling this. We now only need to update this variable after uploading the DP to LCS. Add an inline Powershell step after the upload one and do this:
# Populate & store value to update pipeline
$assetId= "$(GoldenUpload.FileAssetId)"
Write-Output ('##vso[task.setvariable variable=localAsset]{0}' -f $assetId)

#region variables
$ReleaseVariableName = 'axzfileid'
$releaseurl = ('{0}{1}/_apis/release/releases/{2}?api-version=5.0' -f $($env:SYSTEM_TEAMFOUNDATIONSERVERURI), $($env:SYSTEM_TEAMPROJECTID), $($env:RELEASE_RELEASEID)  )
#endregion

#region Get Release Definition
Write-Host "URL: $releaseurl"
$Release = Invoke-RestMethod -Uri $releaseurl -Headers @{
    Authorization = "Bearer $env:SYSTEM_ACCESSTOKEN"
}
#endregion

#region Output current Release Pipeline
#Write-Output ('Release Pipeline variables output: {0}' -f $($Release.variables | #ConvertTo-Json -Depth 10))
#endregion

#Update axzfileid with new value
$release.variables.($ReleaseVariableName).value = $assetId

#region update release pipeline
Write-Output ('Updating Release Definition')
$json = @($release) | ConvertTo-Json -Depth 99
$enc = [System.Text.Encoding]::UTF8
$json= $enc.GetBytes($json)
Invoke-RestMethod -Uri $releaseurl -Method Put -Body $json -ContentType "application/json" -Headers @{Authorization = "Bearer $env:SYSTEM_ACCESSTOKEN" }
#endregion
You need to change the following:
- Line 2: $assetId= “$(GoldenUpload.FileAssetId)”. Change $(GoldenUpload.FileAssetId) for your output variable name.
- Line 6: $ReleaseVariableName = ‘axzfileid’. Change axzfileid for your Release variable name.
And you’re done. This script uses Azure DevOps’ REST API to update the variable value with the file id, and we enabled the OAuth token checkbox to allow the usage of this API without having to pass any user credentials. This is not my idea obviously, I’ve done this thanks to this post from Stefan Stranger’s blog.
Now, in the deploy stages you need to retrieve your variable’s value in the following way:
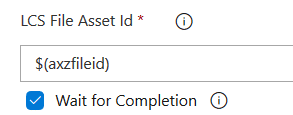
Don’t forget the ( ) or it won’t work!
And with these small changes you can have a release like this:
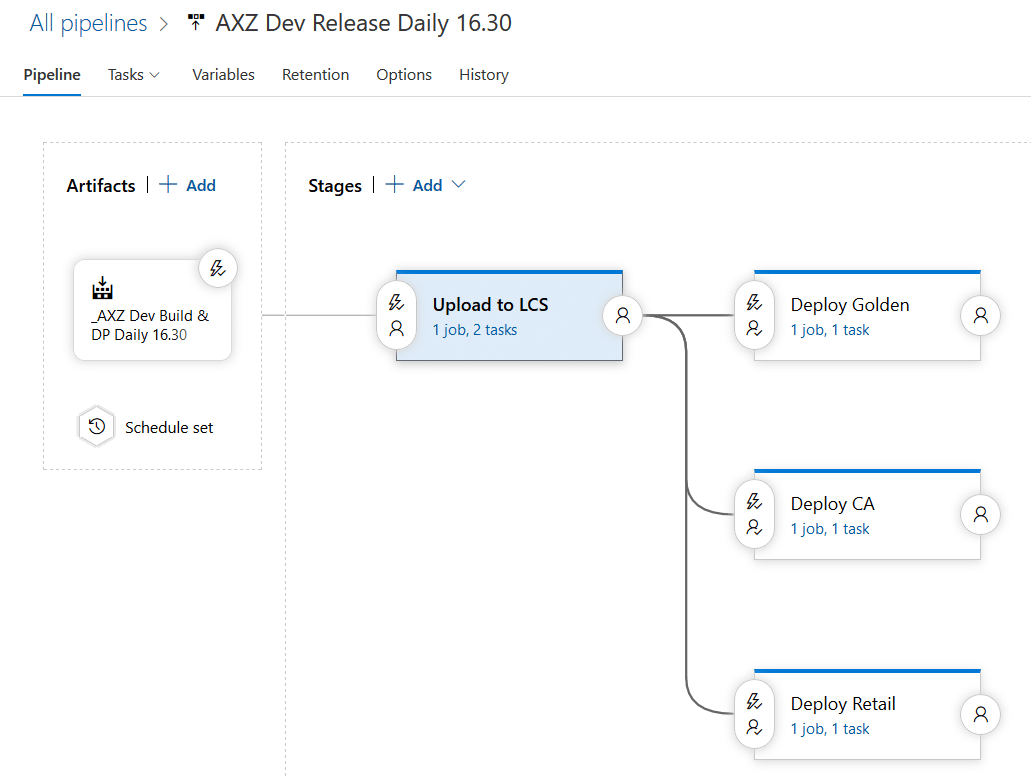
With a single DP upload to LCS and multiple deployments using the file uploaded in the first stage. With approvals, and delays, and emails, and everything!
And now the bad news
The bad news are that, right now, we can’t automate the deployments in self-service environments. We can’t either do this on a production environment, where we must do this manually.


9 Comments
Thanks for sharing!
Thanks Ron!
This is awesome.
On a similar note, is it possible to use a similar approach using DevOps to deploy Microsoft’s Service Updates to non-production instances?
Yes, I’ve actually done it to update all the dev VMs of a customer after an upgrade. You just need to get the asset Id from the service upgrade package in LCS and use it in your pipeline.
Hi Adrià, are you sure that the “Only schedule builds when the source or pipeline has changed” checkbox is working correctly on the selected branch? My experience on various projects is that, despite the configuration, builds are constantly running. Do you know why? Best regards, Frank
Hi Frank,
yes 100% sure. I’m using it in several projects, and the pipelines that have it enabled run only if a check in has been done to that branch.
Is it possible that the branch contains more folders other than the Metadata one? Like the projects folder is there too? For example if an object has been added to a project but is an object that has no changes, and that project is checked in and the project folder is inside that branch, DevOps considers that’s a change in the source.
If there’s more than one workspace mapping, that could also be the cause.
Or is the continuous integration enabled?
Hello Adria,
we actually have more than one folder per branch. The metadata and the projects. But even if absolutely no check-in has taken place, the scheduler ensures that the build starts.
During workspace mapping, I also mapped several folders. In addition to the path for development, I have another path in which I parameterize the information for the Nuget artifacts across branches and versions. But there are no check-ins there either.
Continuous integration is switched off.
Best regards,
Frank