Para hacer esto necesitáis una cuenta de Azure. Si no tenéis una podéis conseguir una gratuita con 180 euros de crédito (200 dólares) para usar en 30 días, y muchos otros servicios gratuitos durante 12 meses.
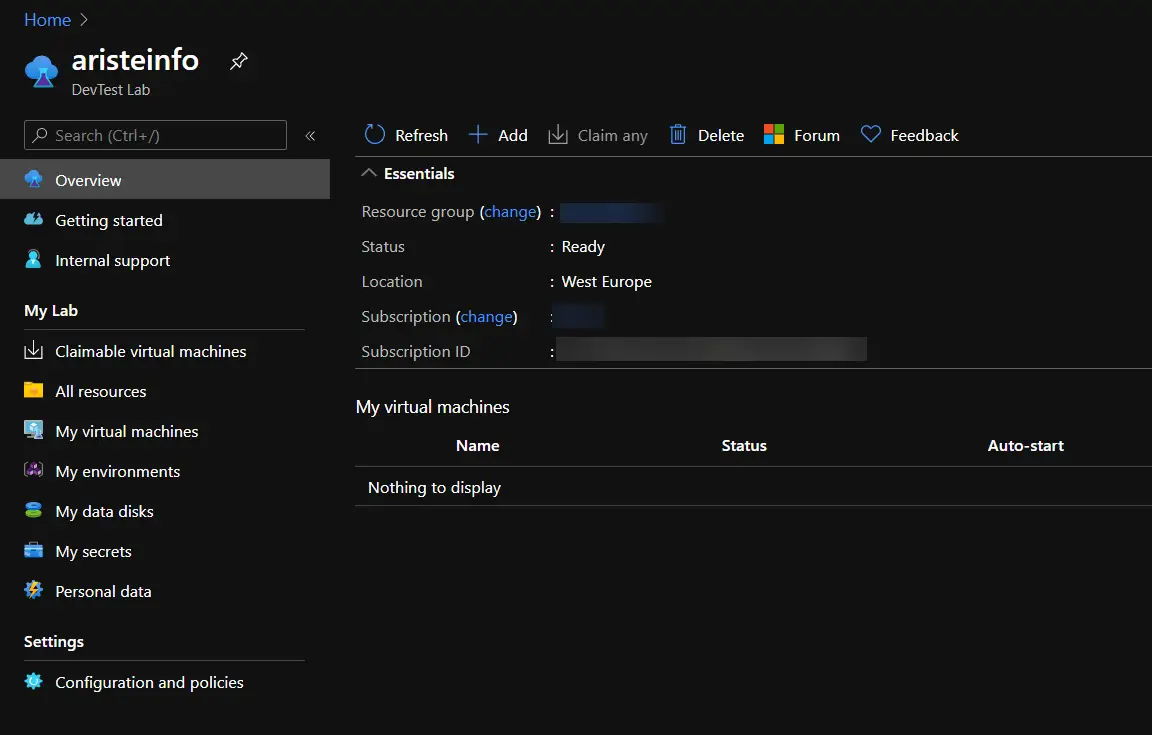
Buscamos DevTest Labs en la barra superior y creamos un nuevo DevTest Lab. Una vez creado abrimos los detalles y deberíamos ver algo como esto:
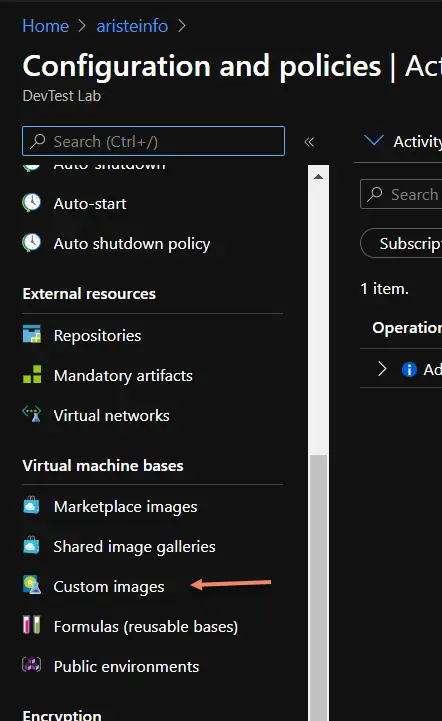
Hacemos clic en el menú “Configuration and policies” en la parte inferior de la lista y bajamos hasta ver la sección “Virtual machine bases”:
Y ahora viene la segunda parte más divertida del proceso: tenemos que subir los 130GB del VHD a un blob! Así que hacemos clic en el botón “Add” en la parte superior y en el nuevo diálogo que se abrirá seleccionamos “Upload a VHD using PowerShell”. Esto nos generará un script de PowerShell para subir el VHD al blob de DevTest Labs. Por ejemplo:
<#
Generated script to upload a local VHD to Azure.
WARNING: The destination will be publicly available for 24 hours, after which it will expire.
          Ensure you complete your upload by then.
Run the following command in a Azure PowerShell console after entering
the LocalFilePath to your VHD.
#>
Add-AzureRmVhd -Destination "https://YOURBLOB.blob.core.windows.net/uploads/tempImage.vhd?sv=2019-07-07&st=2020-12-27T09%3A08%3A26Z&se=2020-12-28T09%3A23%3A26Z&sr=b&sp=rcw&sig=YTeXpxpVEJdSM7KZle71w8NVw9oznNizSnYj8Q3hngI%3D" -LocalFilePath "<Enter VHD location here>"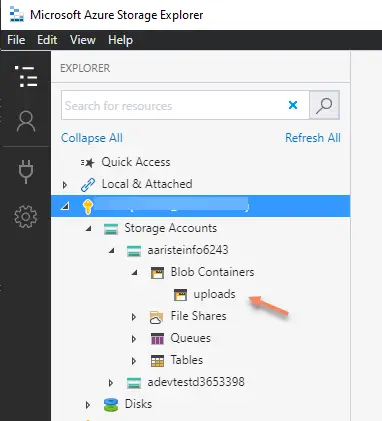
Como alternativa también podemos usar el Azure Storage Explorer como podemos ver en la imagen de la izquierda.
Habría que subirlo al blob uploads.
Cualquiera de los dos métodos es válido para subir el VHD y no sé si alguno de los dos es más rápido que el otro..
Una vez el VHD está subido abrimos la opción “Custom images” de nuevo y deberíamos ver el VHD en el desplegable:

Le damos un nombre y hacemos clic en OK.
Lo que tenemos ahora es una base para una máquina de desarrollo de Dynamics 365 Finance and Operations que tenemos que preparar para poder usar como máquina de build.


