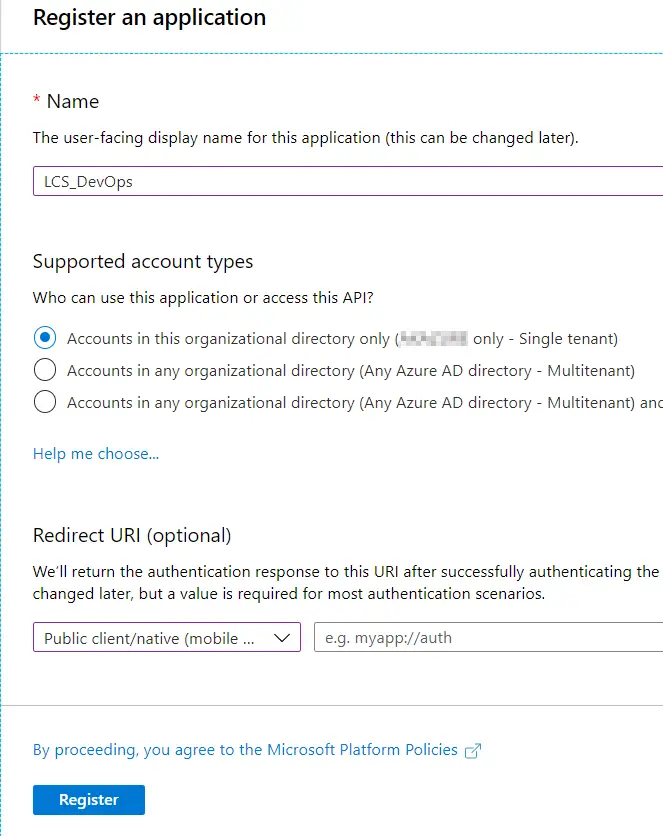
The first step to take is creating an app registration on Azure Active Directory to upload the generated deployable package to LCS. Head to Azure portal and once logged in go to Azure ActiveDirectory, then App Registrations and create a new Native app:

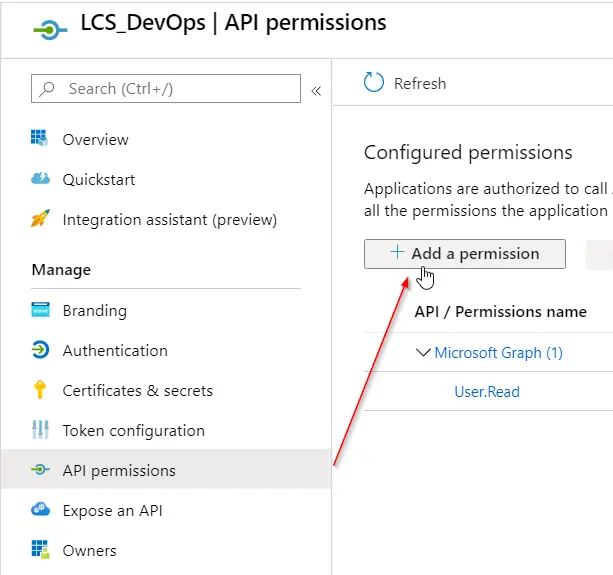
Next go to “Settings” and “Required permissions” to add the Dynamics Lifecycle Services API:

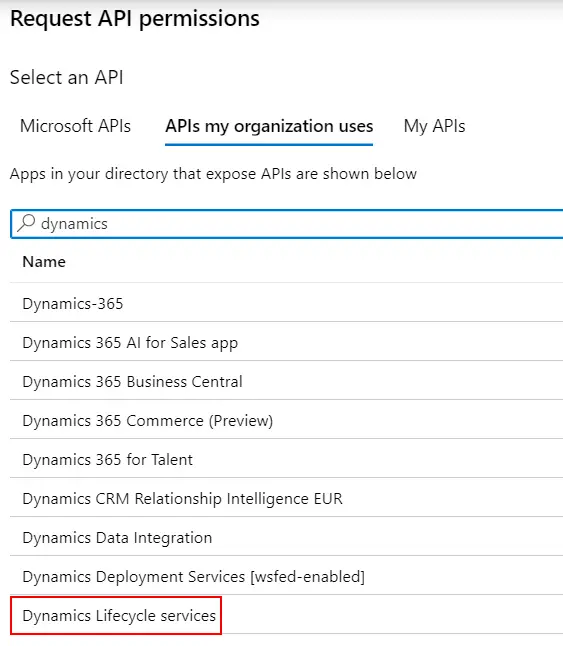
In the dialog that will open, change to the “APIs my organization uses” tab and select “Dynamics Lifecycle Services”:

Select the only available permission in the next screen and click on the “Add permissions” button. Finally, press the “Grant admin consent” button to apply the changes. This last step can be easily forgotten and the package upload to LCS cannot be done if not granted. Once done, take note of the Application ID, we’ll use it later.
There’s an additional step we need to take, which is enabling the app registration as a public client flow. In the Authentication tab, scroll to the bottom and set the option “Enable the following mobile and desktop flows” to Yes.

Thanks to Valery Moskalenko for noticing this in the comments!


2 Comments
Thank you! Could you add the following step from https://learn.microsoft.com/en-us/dynamics365/fin-ops-core/dev-itpro/dev-tools/pipeline-lcs-connection#prerequisites ?
It is necessary to do the following:
4. Configure the registration as a public client application.
In the Azure portal, select your app in App registrations, and then select Authentication.
In Advanced settings > Allow public client flows > Enable the following mobile and desktop flows, select Yes.
Thanks for noticing Valery, I’ve added it to the doc!