All of this can be done on your PC or in a dev VM, but you’ll need to add some files and a VS project to your source control so you need to use the developer box for sure.
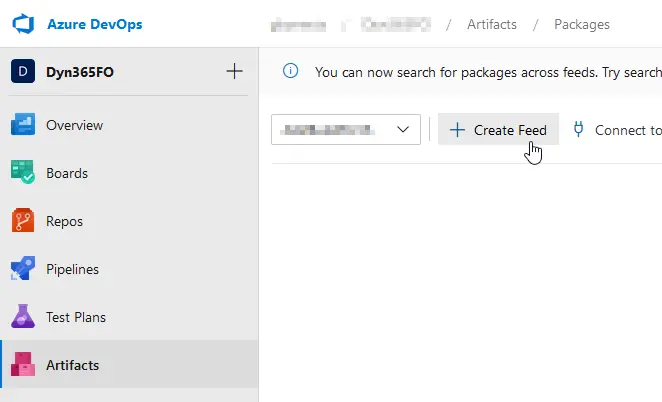
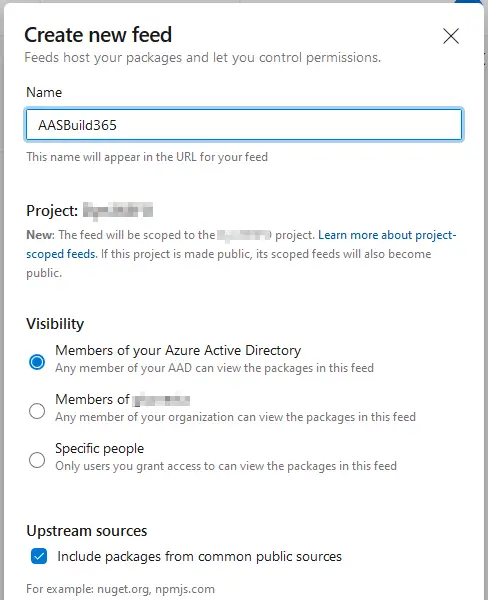
Head to your Azure DevOps project and go to the Artifacts section. Here we’ll create a new feed and give it a name:


You get 2GB for artifacts, the 3 nuget packages’ size is around 500MB, you should have no issues with space unless you have other artifacts in your project.
Now press the “Connect to feed” button and select nuget.exe. You’ll find the instructions to continue there but I’ll explain it anyway.
Then you need to download nuget.exe and put it in the Windows PATH. You can also get the nugets and nuget.exe in the same folder and forget about the PATH. Up to you. Finally, install the credential provider: download this Powershell script and run it. If the script keeps asking for your credentials and fails try adding -AddNetfx as a parameter. Thanks to Erik Norell for finding this and sharing in the comments of the original post!
Create a new file called nuget.config in the same folder where you’ve downloaded the nugets. It will have the content you can see in the “Connect to feed” page, something like this:
| <?xml version=”1.0″ encoding=”utf-8″?><configuration> <packageSources> <clear /> <add key=”AASBuild” value=”https://pkgs.dev.azure.com/aariste/aariste365FO/_packaging/AASBuild/nuget/v3/index.json” /> </packageSources></configuration> |
This file’s content has to be exactly the same as what’s displayed in your “Connect to feed” page.
And finally, we’ll push (upload) the nugets to our artifacts feed. We have to do this for each one of the 3 nugets we’ve downloaded:
| nuget.exe push -Source “AASBuild” -ApiKey az <packagePath> |
You’ll get prompted for the user. Remember it needs to have enough rights on the project.
Of course, you need to change “AASBuild” for your artifact feed name. And we’re done with the artifacts.


6 Comments
Hello Adrià,
In the PU65 the package is too large to be update by the nuget.exe aplication, this is the package that is retrying the error Microsoft.Dynamics.AX.Application.DevALM.BuildXpp.nupkg
¿Did yo do ant pipeline with this version?
Thanks
Kind Regards
Check this: https://anthonyblake.github.io/d365/finance/alm/2024/06/21/d365-alm-10_0_40-update.html
MS split the nuget in 2 new nugets because of that.
Hello Adrià
I have managed to upload Application1-2 and the Compiler nupkgs, but ApplicationSuite and Platform.DevALM.BuildXpp packages throw “pushing took too long, ServiceUnavailable” error, followed by 503 despite entering an abundant timeout.
Hi Efecan,
can you check if any of the NuGet files are over 500MB? When the change was made to split the application file into two, MS was still publishing the old Application file that couldn’t be pushed to the artifacts.
Another issue that I’ve seen in the past was the company firewall blocking me to push the NuGet files to AZDO 😅 If the other files are uploading file I guess this is not the issue. Another problem could be a temporary infrastructure issue on MS side.
The latest Microsoft.Dynamics.AX.Application.DevALM.BuildXpp.nupkg is too big to upload.
Hey Johan,
since a few versions ago, the Application package has been split in two. The larger one is still available for self-hosted agents, and the Application1 and Application2 NuGet packages are meant to be used with the Azure-hosted agent.