If you want to create a classic release pipeline, it’s still possible to do it.
However, if you’ve created a new organization, they might be disabled for new projects. You can enable them in project settings > Pipelines > Settings:

Once that’s done, just go to Releases and create a new one.
Create the pipeline #
Select an Empty job to start:

Now select an artifact by clicking the Add an artifact box:

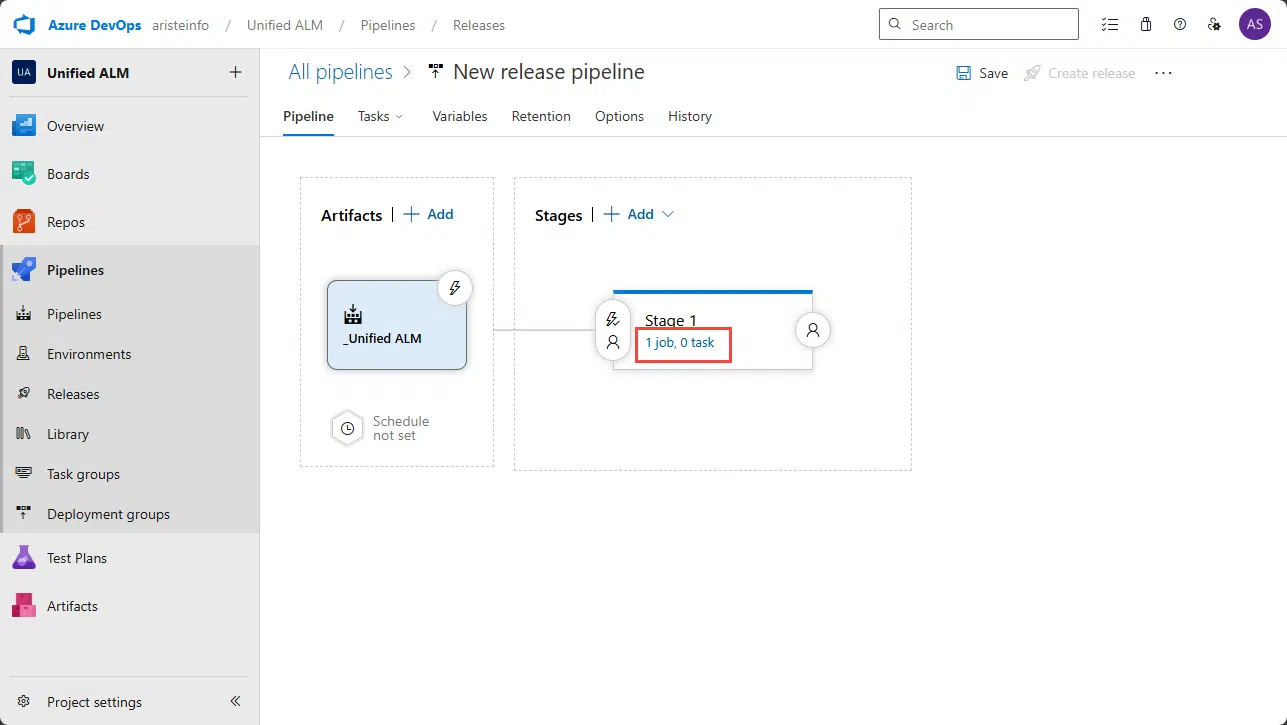
Select your build pipeline and click Add. Now we need to edit the tasks in the stage. Click the 1 job, 0 task link under stages.
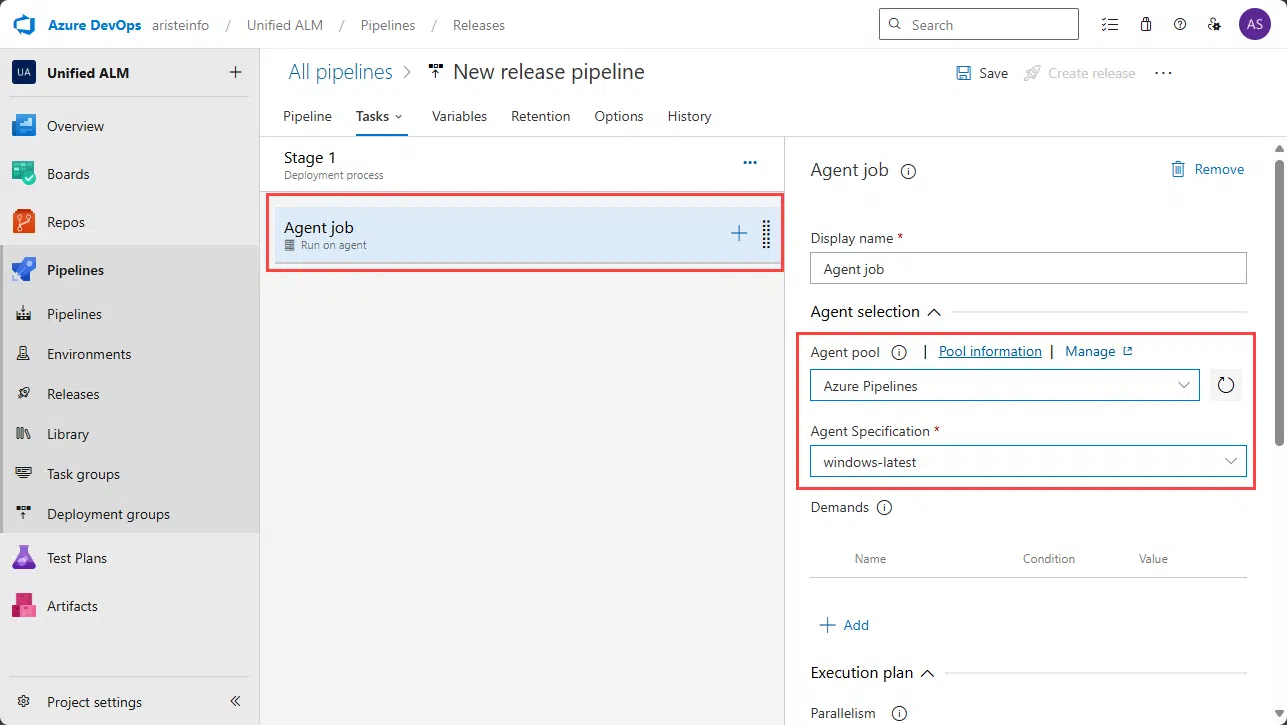
On the Agent job section, make sure to select Azure Pipelines as Agent pool and windows-latest as the Agent Specification:
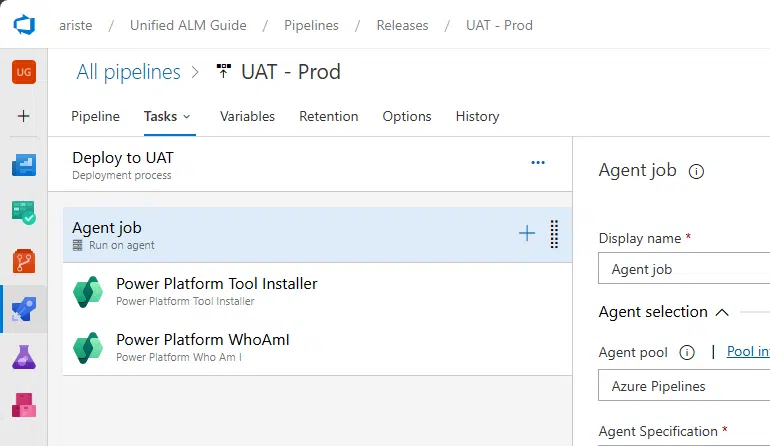
Now it’s time to add the tasks. F&O tasks? No! And this is the biggest difference: we’ll be adding Power Platform tasks!
First add the Power Platform Tool Installer task and then the Power Platform Who Am I task:
Leave the installer task as it is, and select the WhoAmI task. Here we need to create a service connection, and I think I’m going to make us all happy with what’s coming.
Tired of arguing with IT because for the F&O release tools you needed a MFA-less user to create the service connection to LCS? Well, look at this beauty:
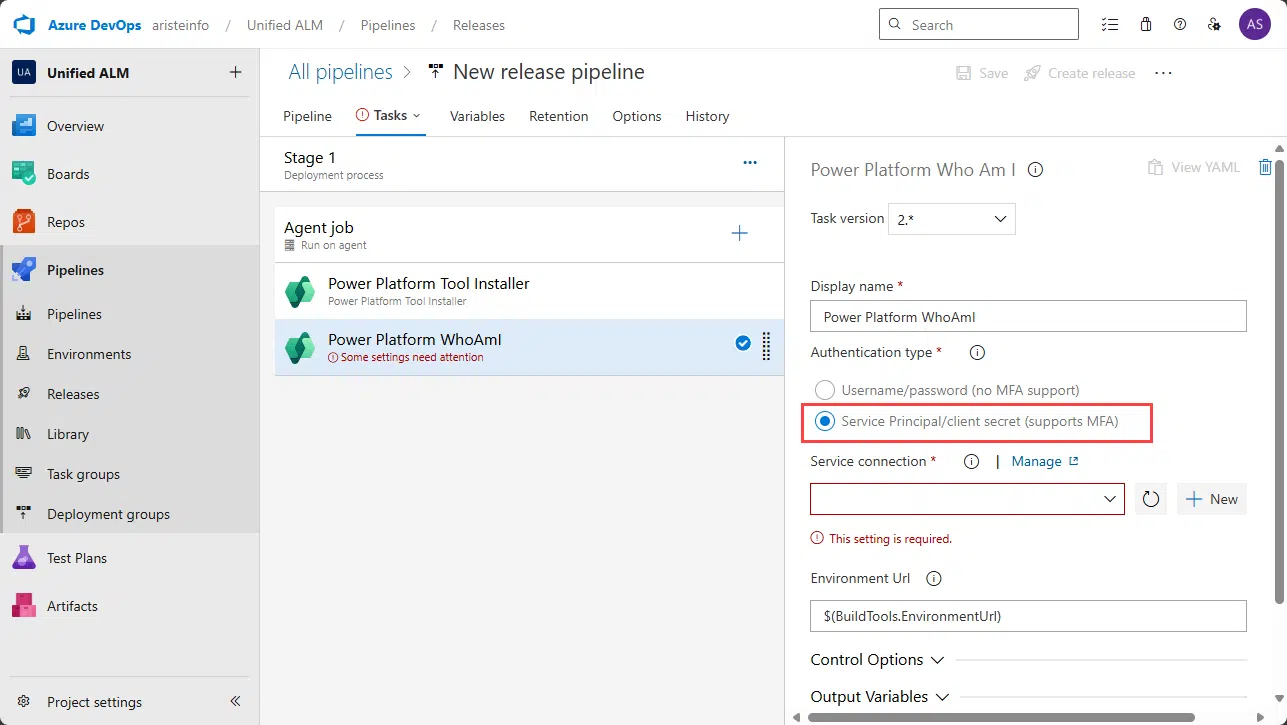
No, you’re seeing it right; with the Power Platform tools, we can use a service principal, and that’s what we’re going to do!
Create the service connection #
Create an Entra ID app registration with a secret on your tenant.
In Azure DevOps, click the New button next to the Service connection field. In the Authentication method, select Application Id and client secret.
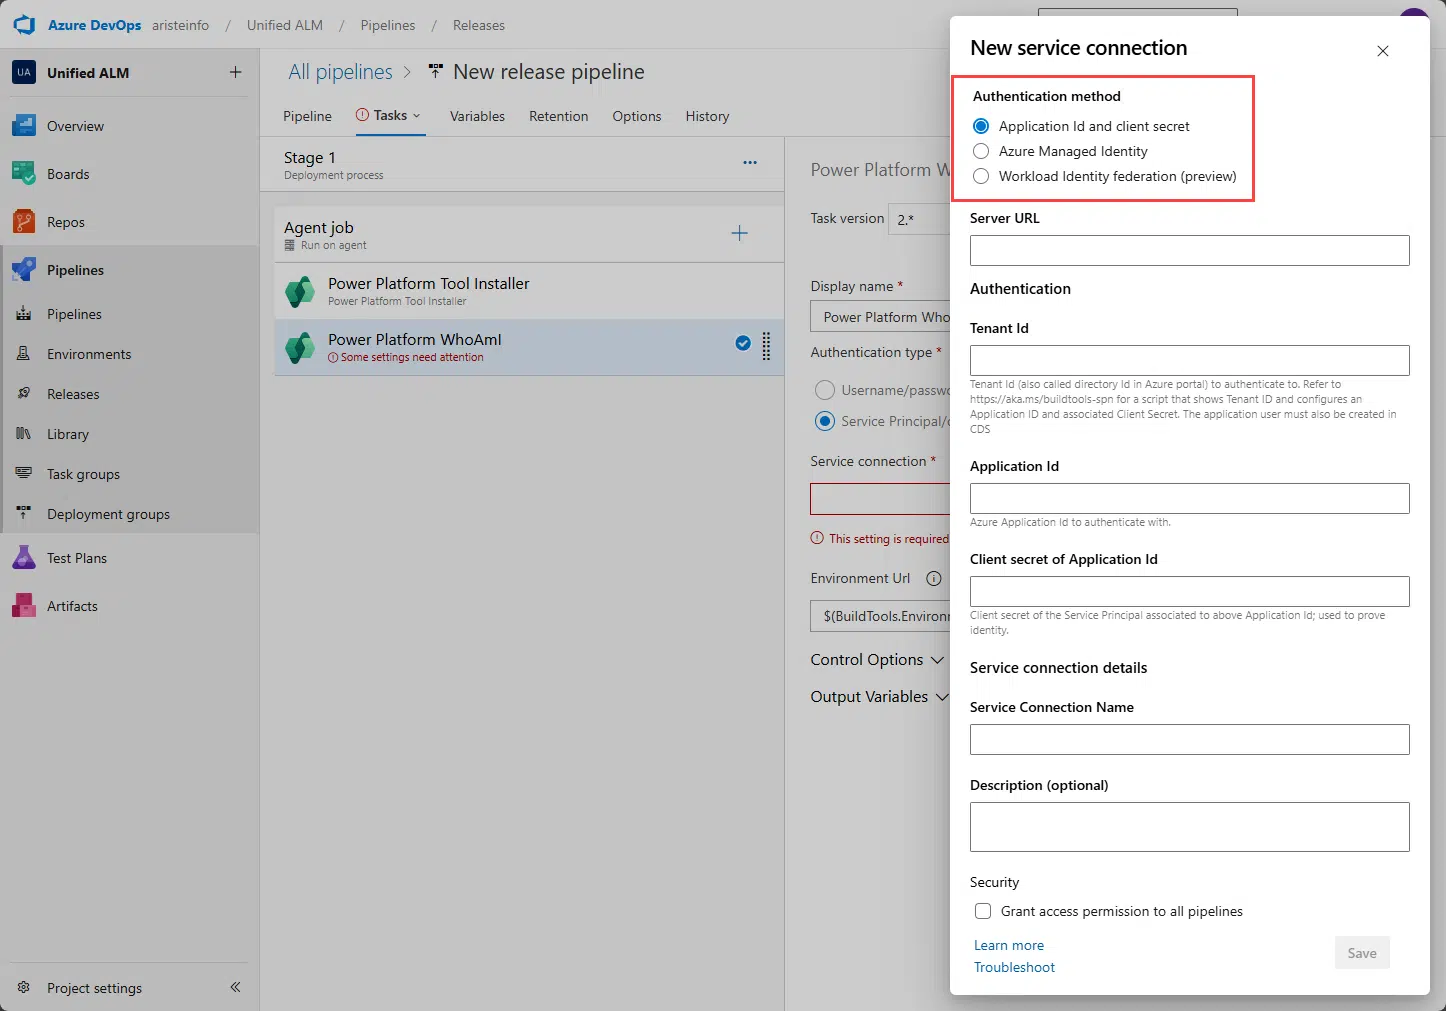
In the Server URL, enter the URL of the Dataverse environment, not the F&O one! It should end in .crmX.dynamics.com.
In Tenant ID, enter what appears on your Entra ID. And use the Application Id and secret you just created.
Finally, give it a name for the environment and click Save.
Add Service Principal to Dataverse #
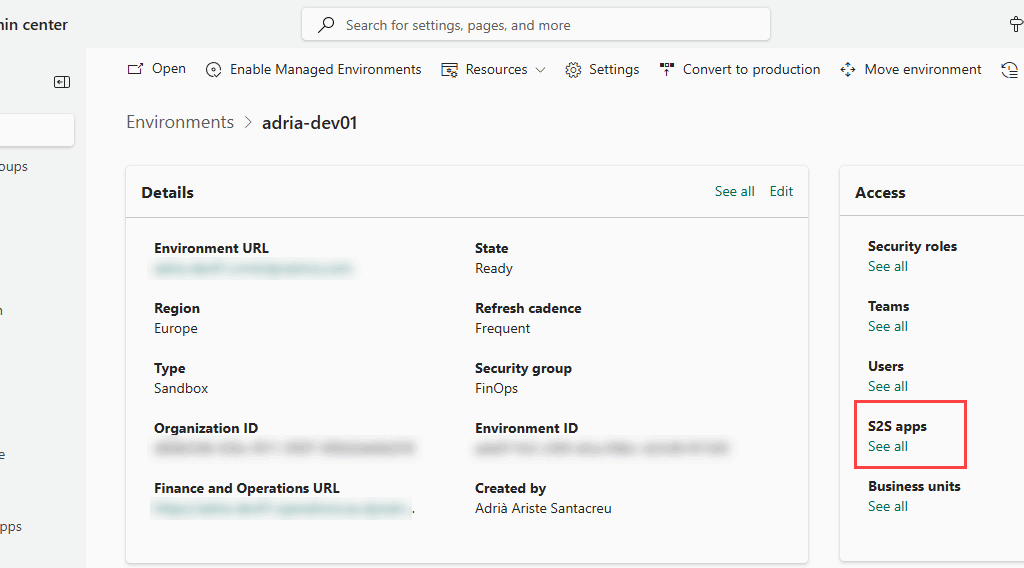
Before being able to deploy the pipeline, we need to add the Service principal as an Application User in Dataverse. Go to PPAC, open your environment details, and select S2S apps:
Click the New app user button and select an app; you can search by name or AppId:
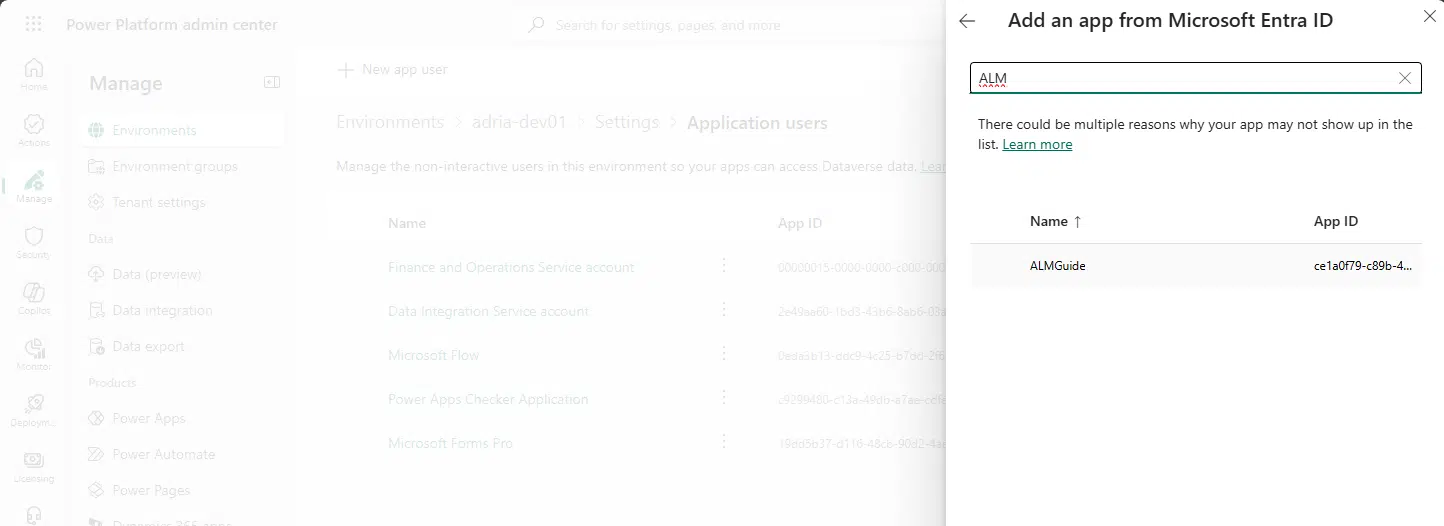
In the Business unit field start typing your environment name and select that.
Click the edit button in Security roles and select the System Administrator role. Click Save and Create.
Your Service principal is ready to rock!
Deploy task #
Now add the Power Platform Deploy Package task to the pipeline and select the service connection we just created.
In the Package File field, you need to enter the following:
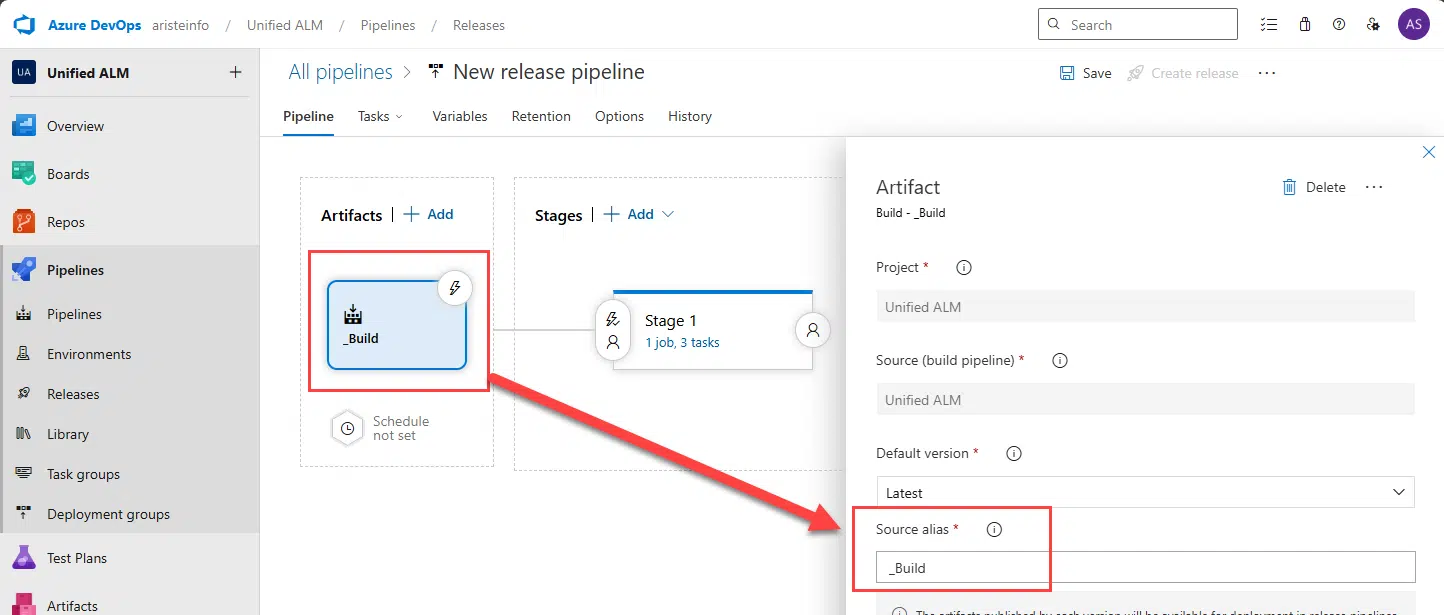
$(System.DefaultWorkingDirectory)/_Build/drop/CloudDeployablePackage/TemplatePackage.dllWhere the _Build part is the Source alias of your Artifact:
Now save the release, and you can test it with the Create release button.


