To follow this example for the Unified Experience, you need to download the template from Microsoft’s repo on GitHub.
As a prerequisite, you have to add the NuGet packages to your artifacts.
If you want to use classic pipelines
Let’s learn how to create the build pipeline using YAML templates.
Prepare YAML file #
Download the latest file with a .yml extension.
First, if you haven’t, take a look at this section of the documentation: Configure your Git Repository. This is important because I’ll use that folder structure on the repo.
Upload the file to the Tools\Pipeline folder:
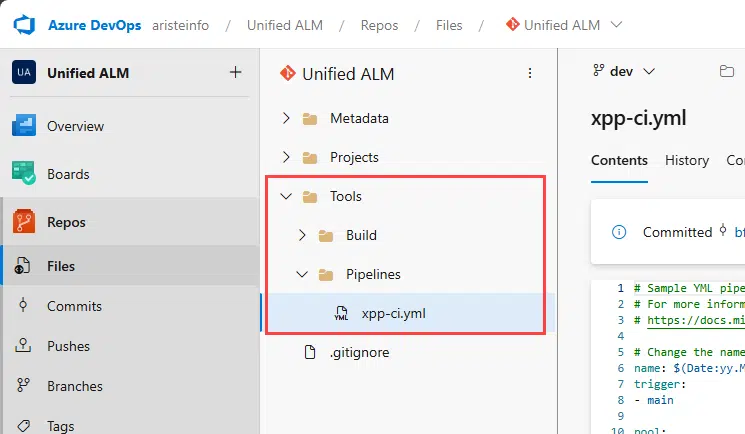
Rename it if you like, and now we must change it a bit:
- In the
triggersection make sure that it matches the branch you want to build. Add triggers or schedules as needed. - In the
poolsection, undervmImageyou will see windows-2019. This image will be retired. Replace it with windows-latest or windows-2025. - In the
variablessection, change the NugetConfigsPath variable to ‘$(Build.SourcesDirectory)\Tools\Build’. This points the build process to look for the .config files in that folder. If you have them somewhere else, change it to fit your setup. - In the VSBuild@1 task, replace the vsVersion value with 17.0 to run using the latest Visual Studio version.
Click the Commit button, and wait a second!
Update XppCreatePackage #
I want to have a section for this because it’s VERY important for our Unified Experience ALM.
Change the XppCreatePackage@0 task to XppCreatePackage@2, and now click its Settings link:
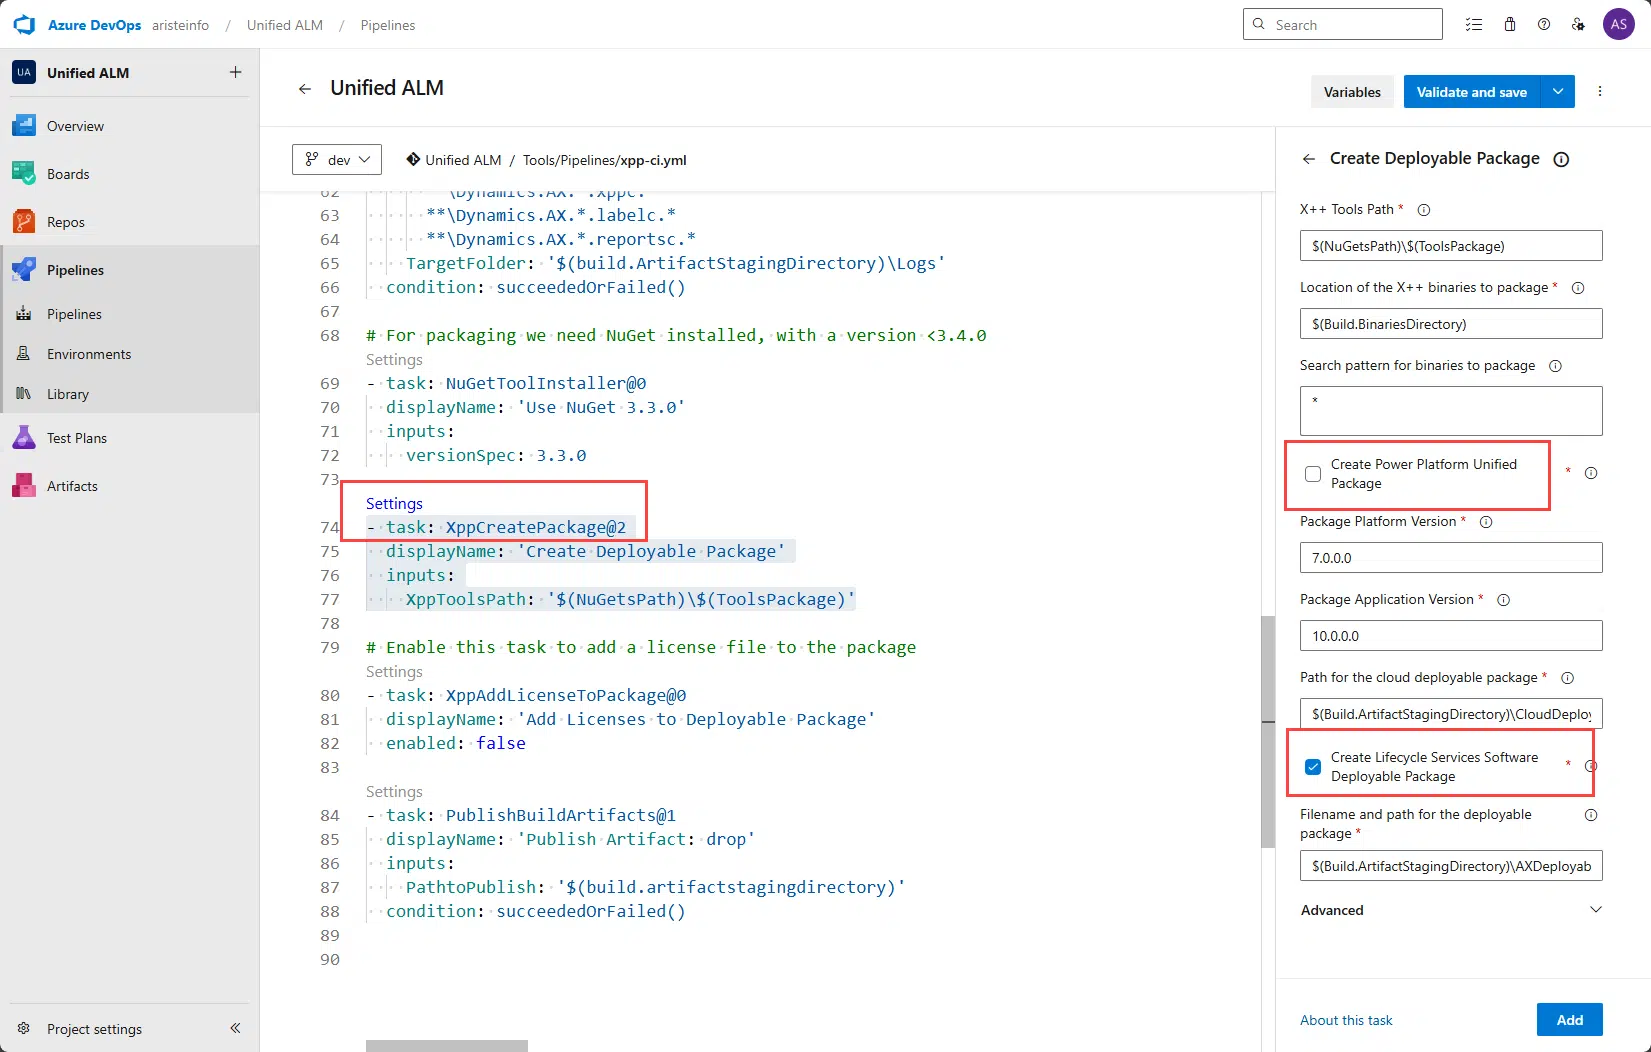
Why is it so important? Look at the highlighted fields on the right. We’ve got something new here!
- Create Lifecycle Services Software Deployable Package: if this option is selected, the build will produce a software deployable package for LCS. What we’ve used until now.
- Create Power Platform Unified Package: if this option is selected, the build process creates a Dataverse managed solution with our X++ code! This is what we’re going to use in our release pipeline.
You can use one, the other, or both. But to follow this guide, make sure to select the Create Power Platform Unified Package one.
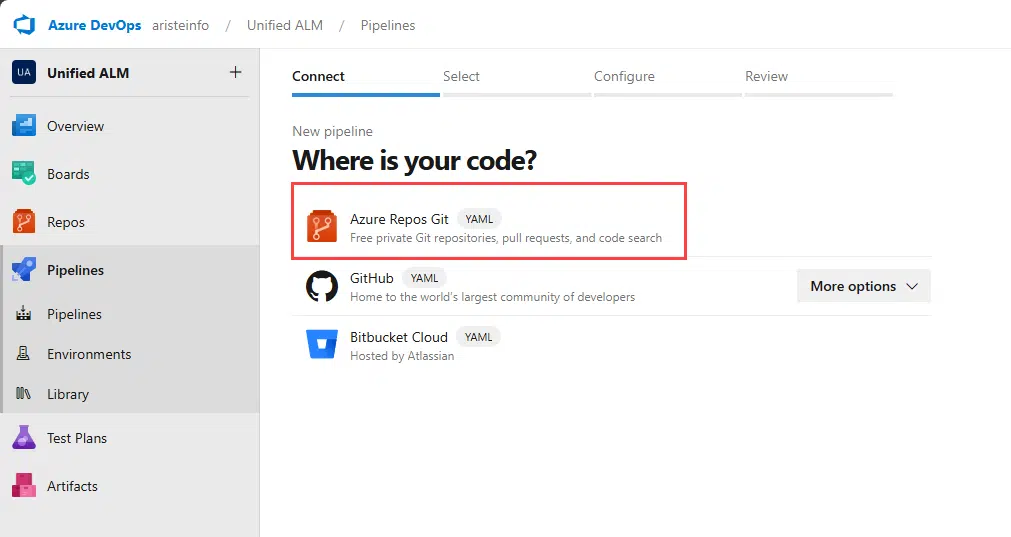
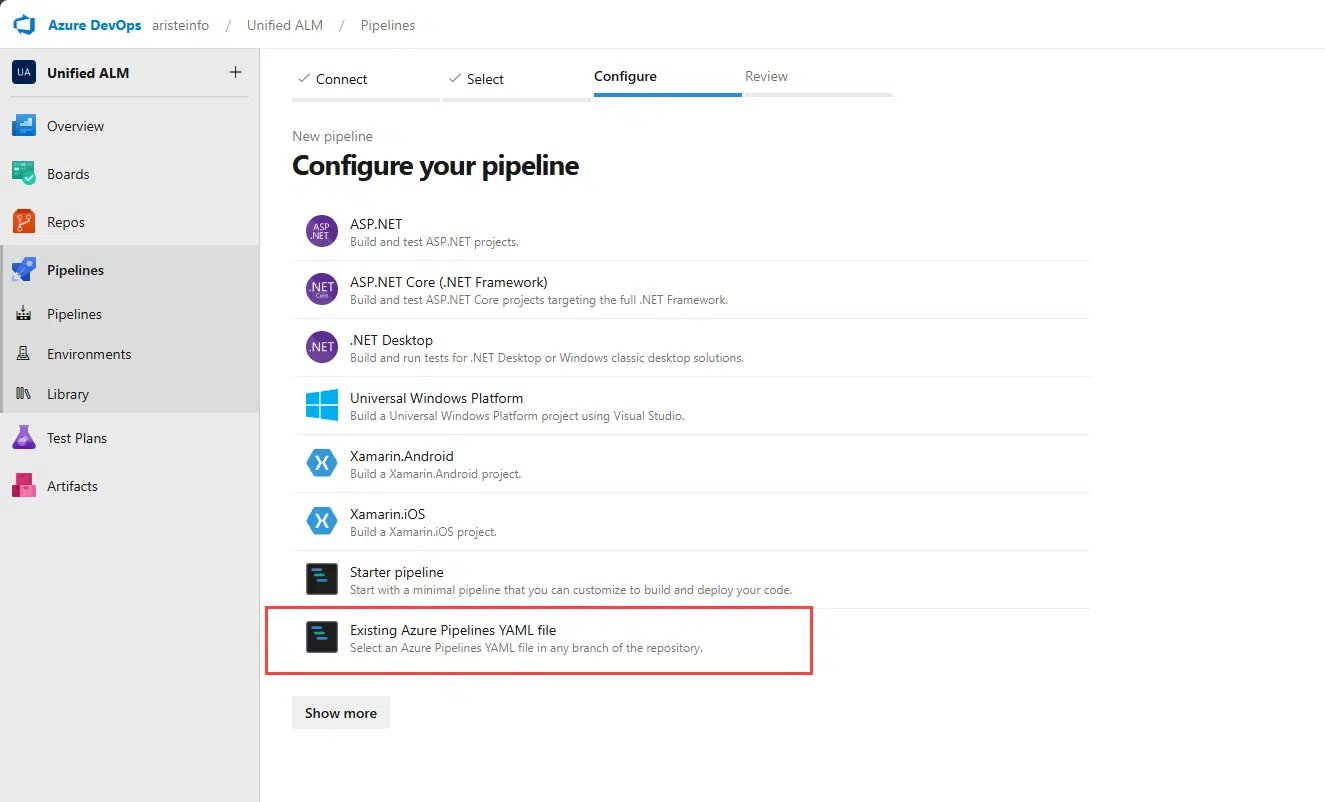
Create new pipeline #
Go to the Pipelines section and click the New pipeline button.
Next, select Azure Repos Git:
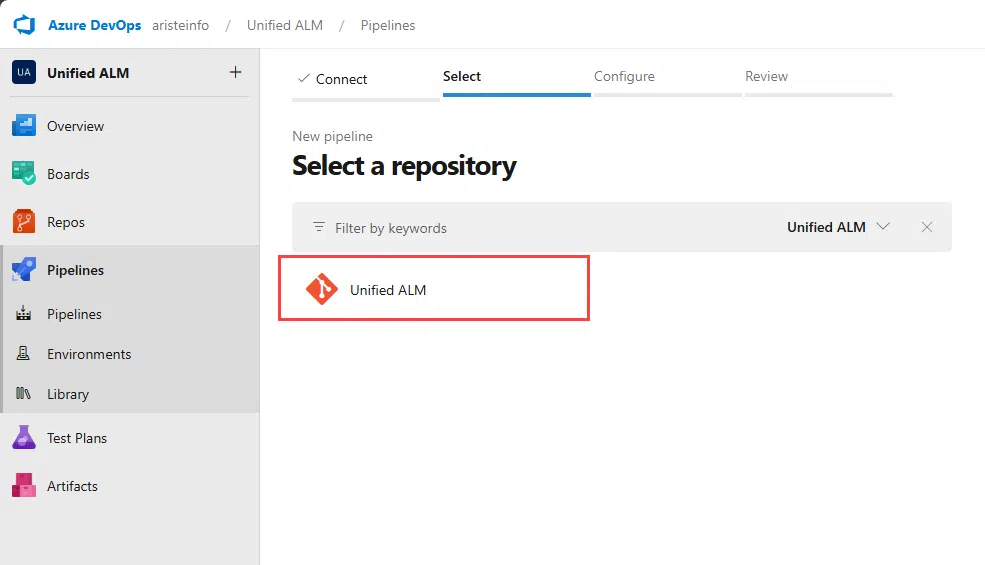
Select your repo:
Select Existing Azure Pipelines YAML file:
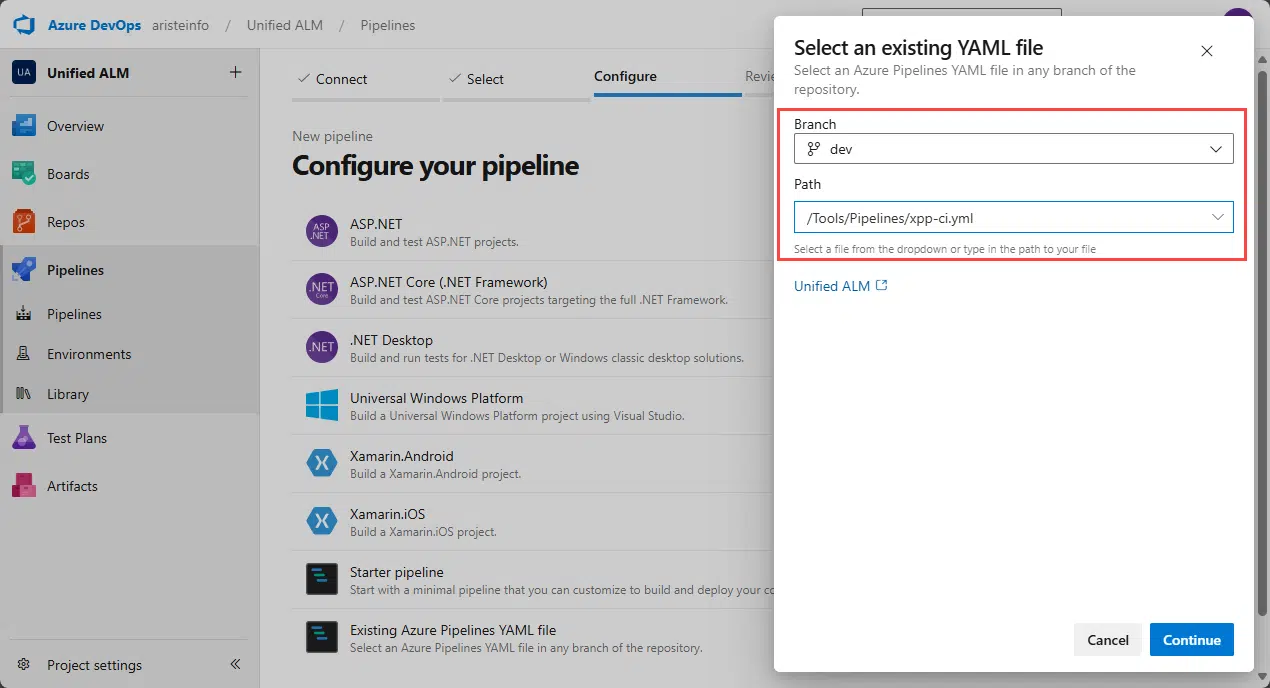
Select the branch and YAML file that contains the pipeline definition, and click Continue:
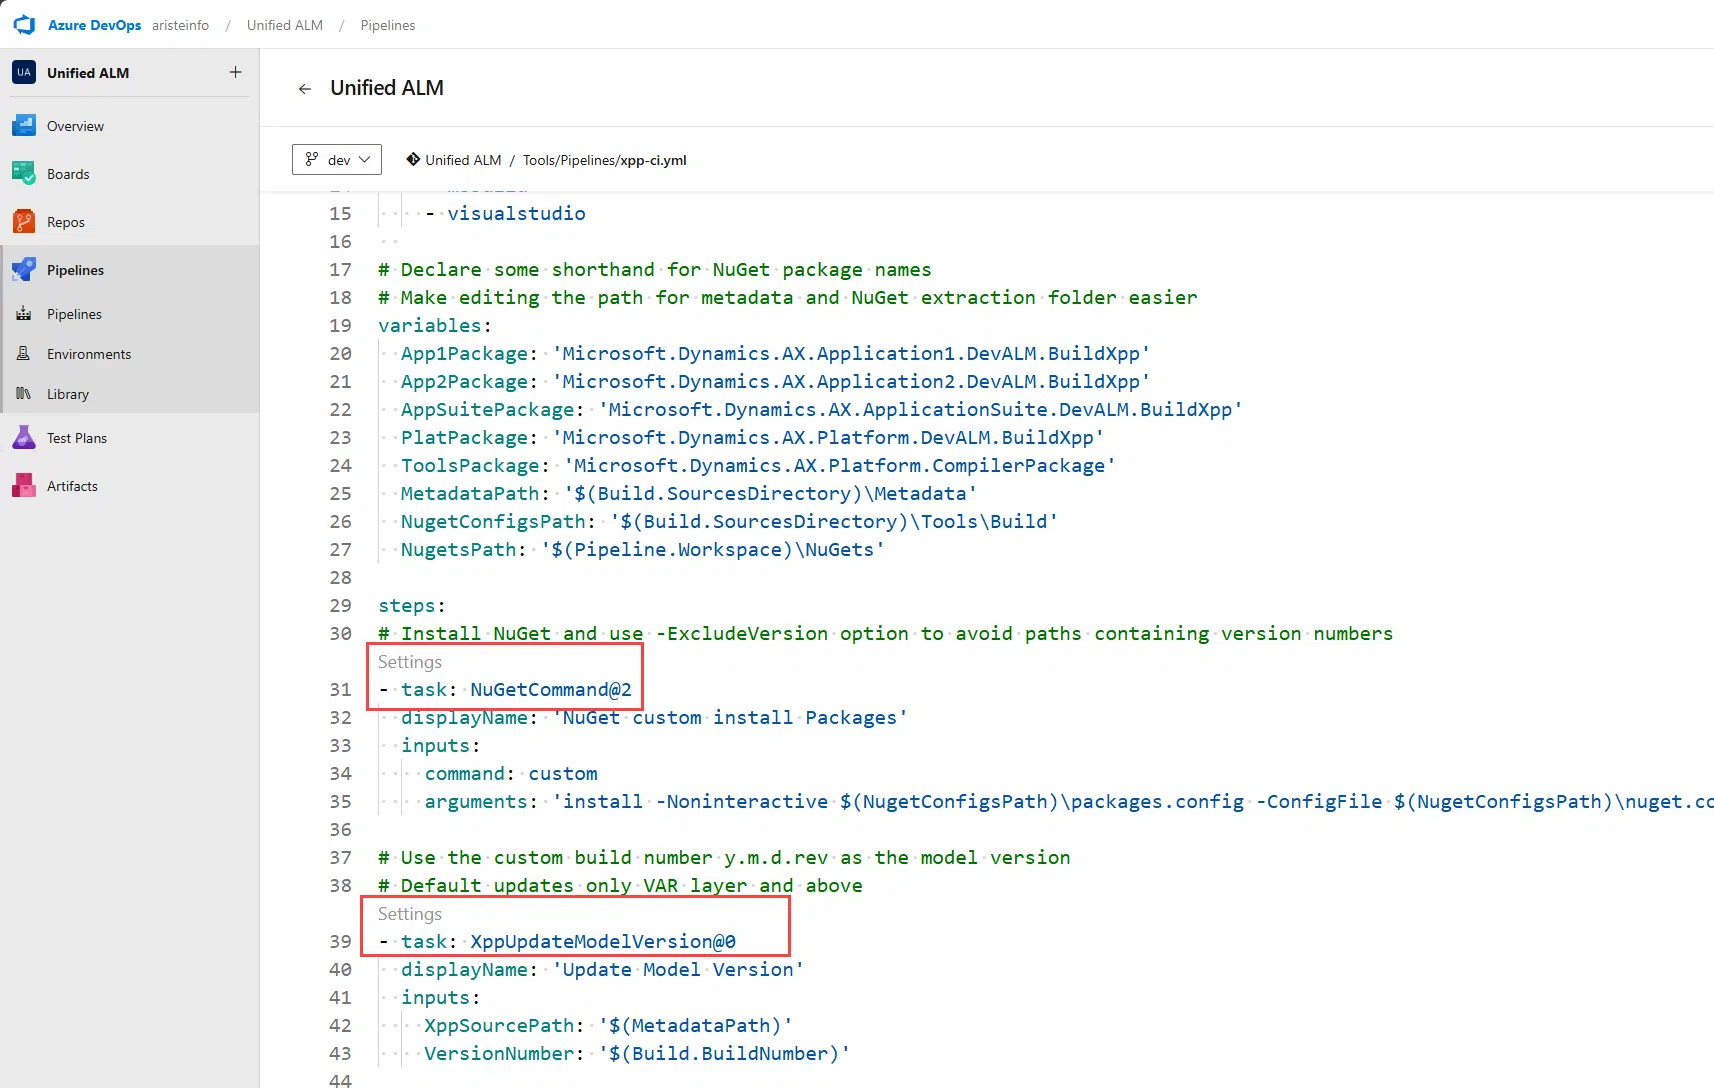
Now you will see your pipeline definition. Here you could modify it too, and the changes will be saved in the repo. We already did the changes we needed, so just click the Run button.
Editing the steps #
While the pipeline runs, let’s take a look at the steps. If you look closely, you will see that for each task in the steps, there’s a Settings link:
If you click this link, you’ll get a side pane on the right that displays the value of the inputs for each task:
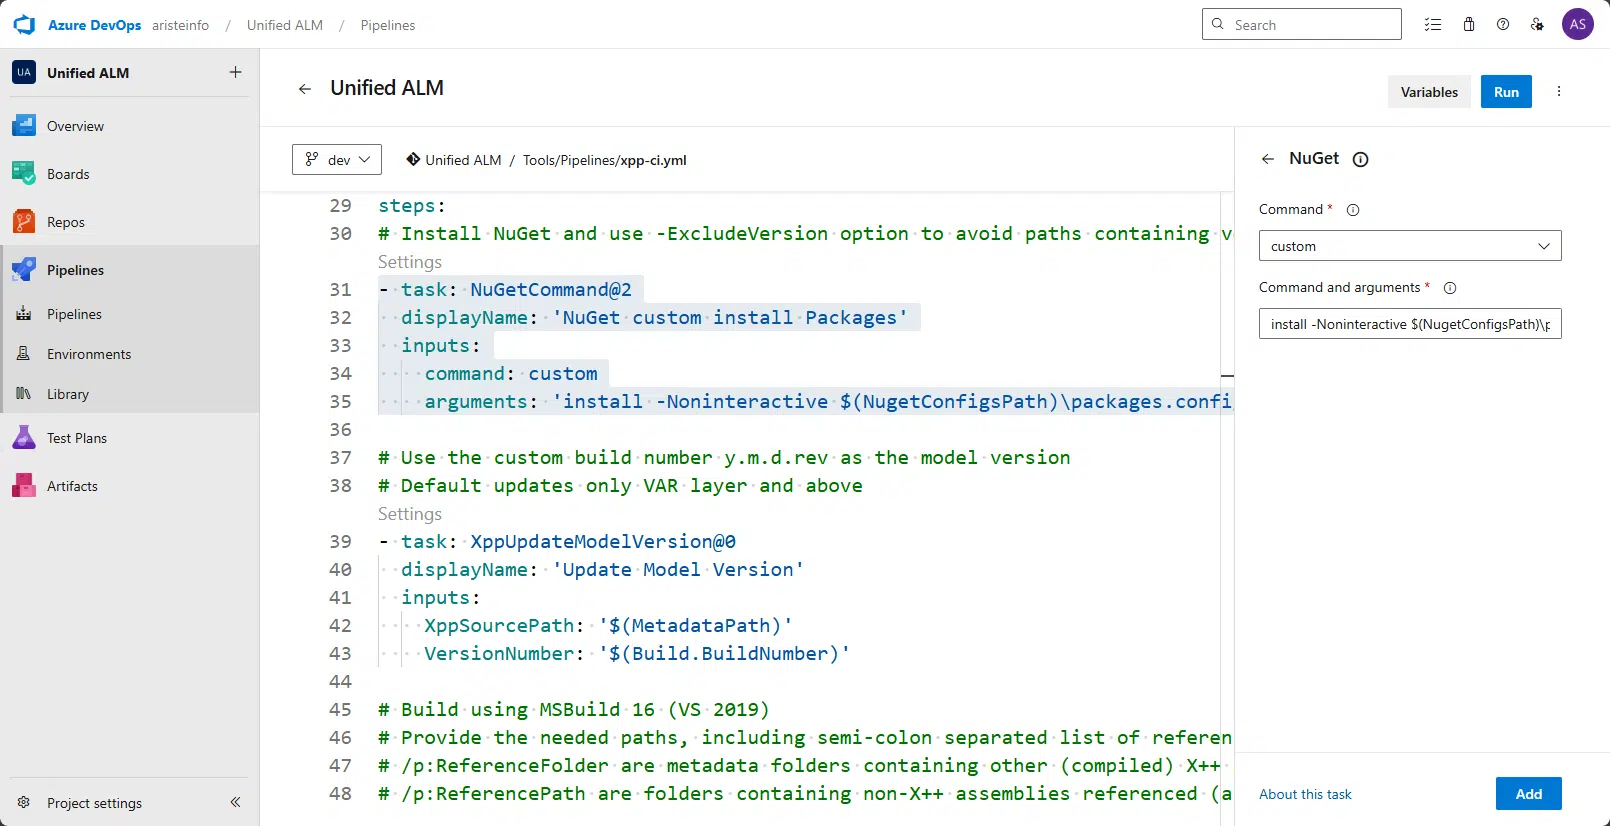
So, if you’re a bit allergic to the pipeline as code, you still have some graphical help 😉
Like in classic pipelines, it’s possible to remove the tasks that you don’t need; just delete them from the file.
Check your pipeline run #
If everything is fine, you will see something like this:
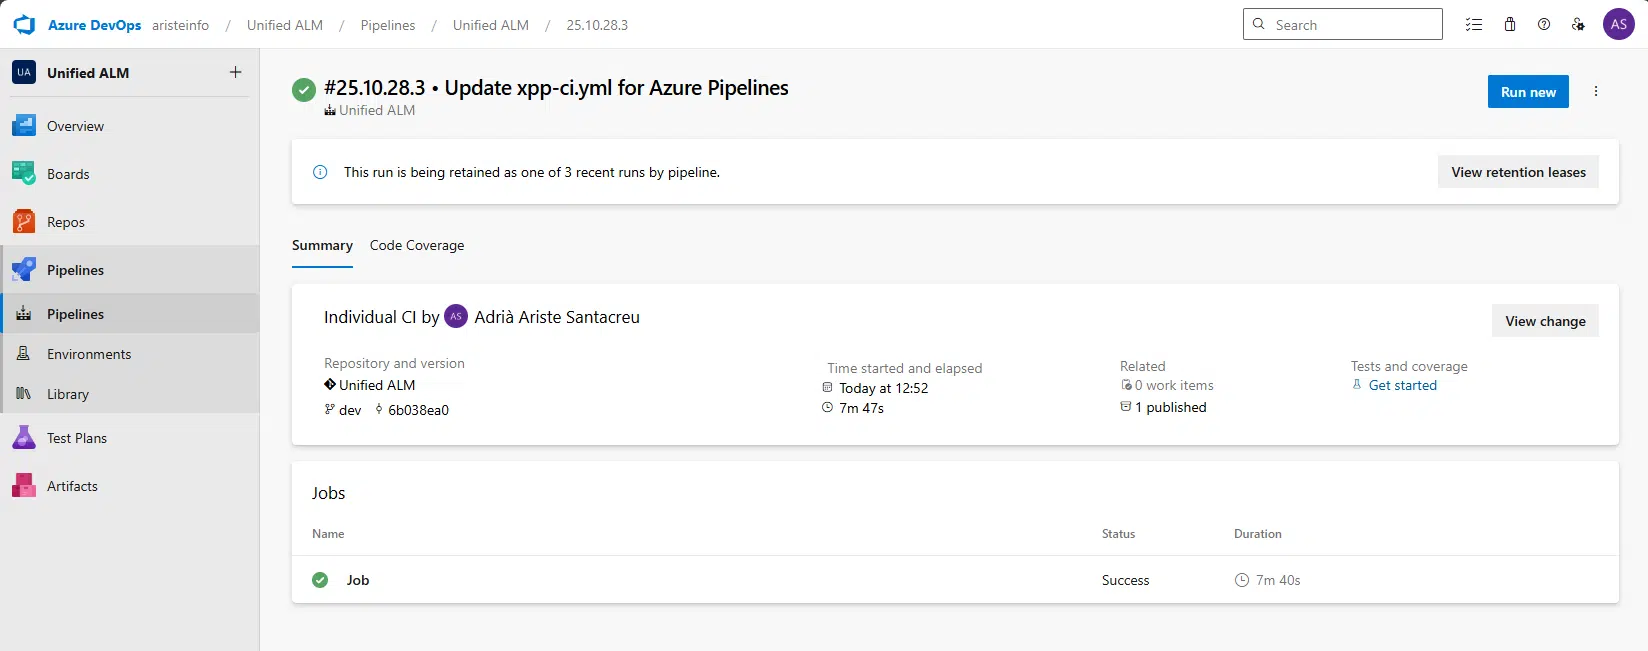
You can see that it’s ended with no errors, and there’s 1 published artifact. If you click it and open the folders, you’ll see this:
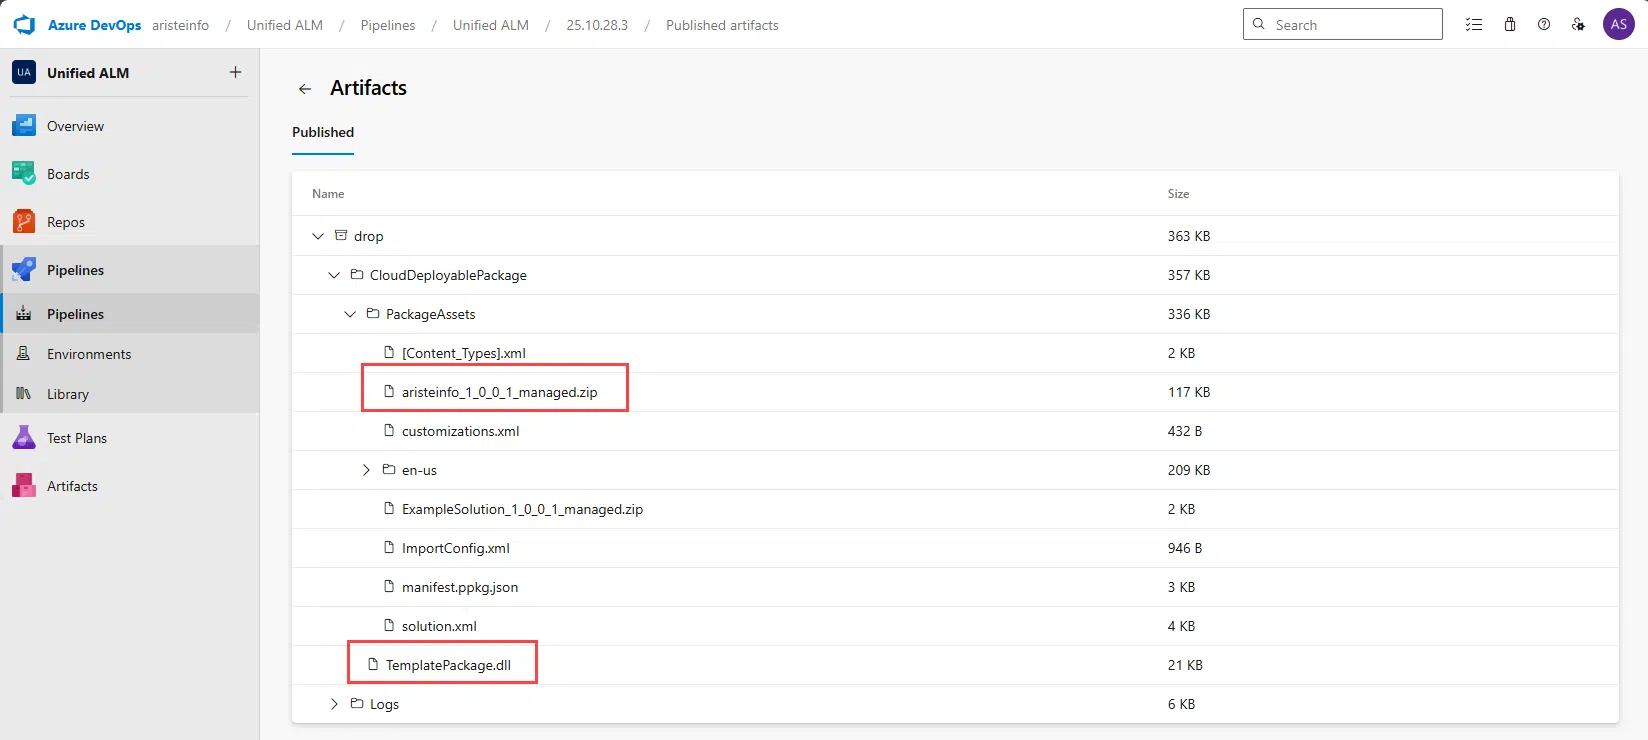
You can see the DLL file that we’ll deploy later in the release pipeline and the model that’s been built.
And just like that, we’ve got a build pipeline running.


2 Comments
Hi Adria,
I cannot find the process of creating classic build pipeline for UDE.
It’s the same as before. You can find it here: http://ariste.info/dynamics365almguide/configure-pipeline/