Moving data from the production to a sandbox environment is something we regularly have to do to have real updated data to do some testing or debugging. It’s a process that takes time and that can be automated as I explained in the post LCS DB API: automating Prod to Dev DB copies.

In this post, I’ll add an extra step to the database refresh: restore a data package (DP). Why? Because I’m sure we all need to change some parametrization or some endpoints in our test environments after a prod refresh.
You can learn more about the DMF REST API, which I’ll use, reading this post from Fabio Filardi: Dynamics 365 FinOps: Batch import automation with Azure Functions, Business Events and PowerBI.
How will we do it? #
The idea is the following:
- We’re using the LCS DB API to refresh a sandbox environment with data from production.
- We’ve previously exported the data package we will restore.
- We need an Azure blob storage account to host the data package we’ve exported.
- Furthermore, we will use the Data management package REST API to get the Dynamics 365 blob URL and OData actions to import the data package.
I’ll be skipping the DB restore part because I already explained how to do it, that’s the base for this post.
The flow will be:
- Get a SAS URL for our saved data package from our Azure blob.
- Get the SAS URL for the blob of our Dynamics 365 target environment using the GetAzureWriteUrl OData action.
- Copy our data package from the source blob to the target blob.
- Execute the import with the ImportFromPackage action.
Create an Export project #
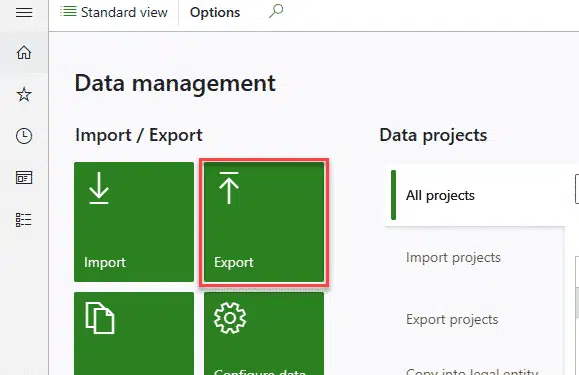
This is the first thing we need to do in our source environment where we want to get our data from. We have to create an export project that contains all the entities that we will restore in our target environment. Head to the Data management workspace and then press the Export tile:
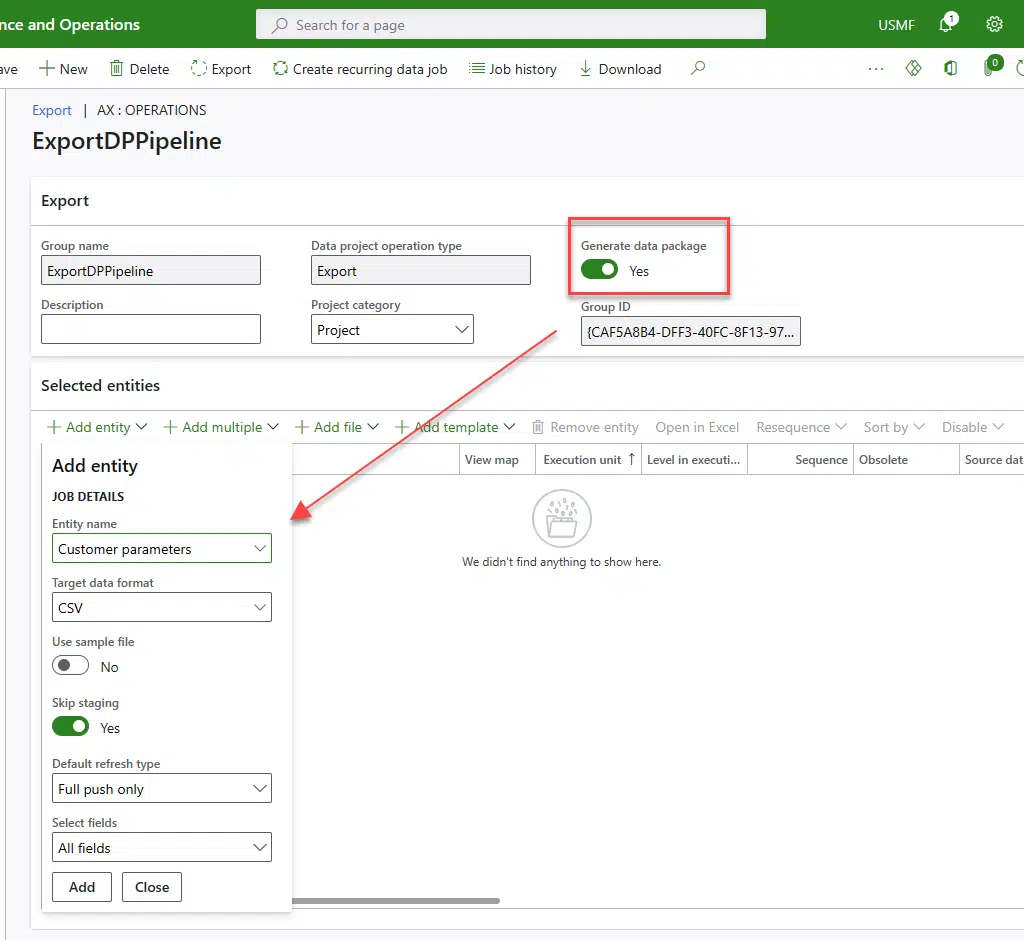
Make sure you check the Generate data package checkbox in the export project and then add all your entities that will be uploaded and imported later:
Run the job and when it’s done download the data package.
Create an Azure Blob and upload the Data package #
Create an Azure blob storage account, first the storage account, then the blob in it, and upload the data package we’ve exported there.
Create an Import project #
The next step will be creating an import project in our target environment to import our DP and also reference it in our pipeline. Select the DP we’ve exported in the first step and add it:

Azure DevOps pipeline #
And the last step is to create a new pipeline or add additional steps to the pipeline that will run your DB refresh.
Update: let’s forget about uploading azcopy.exe to our repo, we’ll be using d365fo.tools.
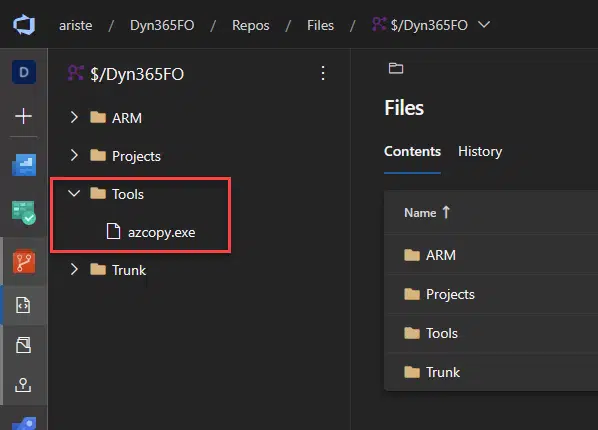
What I’ve done to start is upload azcopy.exe to my code repository:
Why? Because I’ve tried using the Blob service REST API and couldn’t manage to copy from the source blob to the target blob, so I chose the easy way (for me).
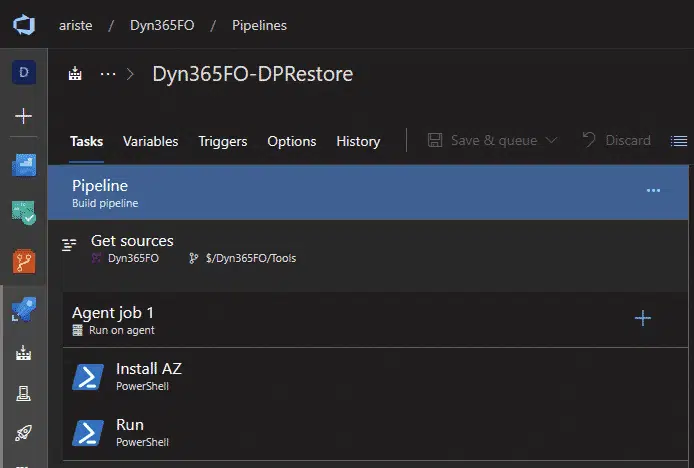
Then, my pipeline consists of two tasks:
In the Get sources section I’ve just mapped the Tools folder, like this:
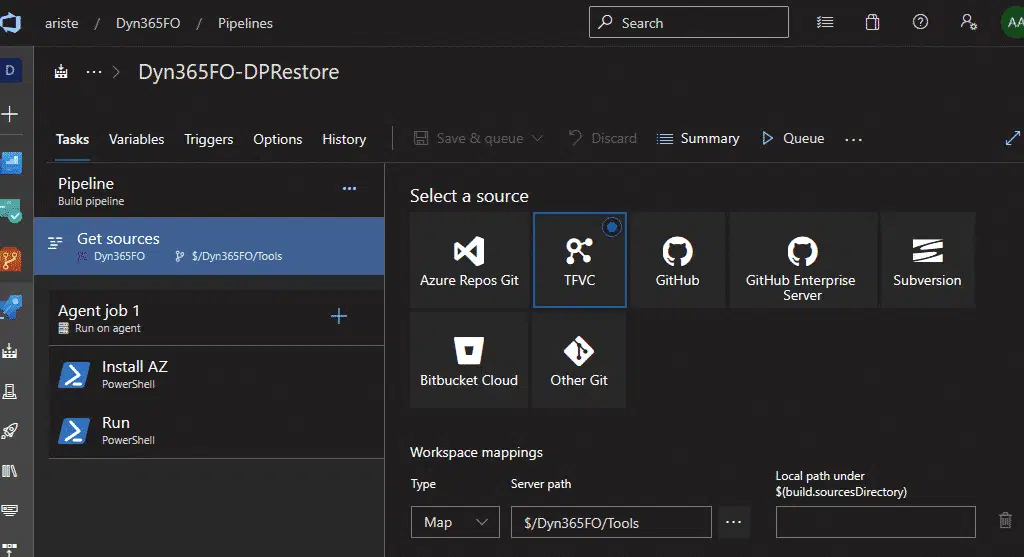
And regarding the tasks, both are PowerShell tasks, and in the first one, I just install the Azure PowerShell module and d365fo.tools, and then we’ll install azcopy in the c:\temp folder. I could do everything in one task, this is only a matter of organization. This first task has this script:
Install-Module -Name AZ -AllowClobber -Scope CurrentUser -Force -Confirm:$False -SkipPublisherCheck

Install-Module -Name d365fo.tools -AllowClobber -Scope CurrentUser -Force -Confirm:$false

Invoke-D365InstallAzCopy -Path "C:\temp\AzCopy.exe"
So each time the Microsoft-hosted pipeline runs, it will install the Azure PowerShell module.
And in the second step is where everything else is happening, this is the full script which I’ll comment on later:
# Getting settings
$file = "YOUR_EXPORTED_DP.zip"
$saname = "YOUR_STORTAGE_ACCOUNT_NAME"
$containername = "CONTAINER_NAME"
$key = "ACCESS_KEY"
$environmentUrl = "Dynamics365FNO_ENVIRONMENT_URL"

# Get source blob URL
$ctx = New-AzStorageContext -StorageAccountName $saname -StorageAccountKey $key
$blob = Get-AzStorageBlob -Blob $file -Container $containername -Context $ctx -ErrorAction Stop
$StartTime = Get-Date
$EndTime = $startTime.AddMinutes(2.0)

$sourceUrl = New-AzStorageBlobSASToken -Container $containername -Blob $file -Permission r -StartTime $StartTime -ExpiryTime $EndTime -FullUri -Context $ctx

# GET BLOB DEST URL
$headers = New-Object "System.Collections.Generic.Dictionary[[String],[String]]"
$headers.Add("Content-Type", "application/x-www-form-urlencoded")
$headers.Add("Accept", "application/json")

$body = New-Object "System.Collections.Generic.Dictionary[[String],[String]]"
$body.Add("tenant_id", "yourtenant.com")
$body.Add("client_id", "AZURE_APP_ID")
$body.Add("client_secret", "SECRET")
$body.Add("grant_type", "client_credentials")
$body.Add("resource", $environmentUrl)

$response = Invoke-RestMethod 'https://login.microsoftonline.com/yourtenant.com/oauth2/token' -Method 'POST' -Headers $headers -Body $body
$response | ConvertTo-Json

#UPLOAD/copy from source to dest
$headersDest = New-Object "System.Collections.Generic.Dictionary[[String],[String]]"
$headersDest.Add("Content-Type", "application/json")
$tokenAuth = "Bearer " + $response.access_token
$headersDest.Add("Authorization", $tokenAuth)

$currDate = Get-Date -Format "yyyyMMdd_HHmmss"
$uploadId = "restoreDP" + $currDate + ".zip"
$bodyDest = '{"uniqueFileName": "' + $uploadId + '"}'
$getAzureUrl = $environmentUrl + "https://static.ariste.info/data/DataManagementDefinitionGroups/Microsoft.Dynamics.DataEntities.GetAzureWriteUrl"

$responseDest = Invoke-RestMethod $getAzureUrl -Method 'POST' -Headers $headersDest -Body $bodyDest
$responseDest | ConvertTo-Json
$objUrl = $responseDest.value | ConvertFrom-Json
$destinationUrl = $objUrl.BlobUrl


#COPY TO TARGET
$fileNameCopy = "c:\temp\" + $uploadId + ".zip"

c:\temp\azcopy.exe copy $sourceUrl $fileNameCopy --recursive

c:\temp\azcopy.exe copy $fileNameCopy $destinationUrl --recursive

# EXECUTE IMPORT
$headersImport = New-Object "System.Collections.Generic.Dictionary[[String],[String]]"
$headersImport.Add("Content-Type", "application/json")
$headersImport.Add("Authorization", $tokenAuth)

$bodyImport = "{
`n    `"packageUrl`": `"" + $destinationUrl + "`",
`n    `"definitionGroupId`": `"ImportDP`",
`n    `"executionId`": `"`",
`n    `"execute`": true,
`n    `"overwrite`": true,
`n    `"legalEntityId`": `"USMF`"
`n}"

$executeImportUrl = $environmentUrl + "https://static.ariste.info/data/DataManagementDefinitionGroups/Microsoft.Dynamics.DataEntities.ImportFromPackage"

$responseImport = Invoke-RestMethod $executeImportUrl -Method 'POST' -Headers $headersImport -Body $bodyImport
Step by step #
The first block corresponds to the settings of your blob storage account and Dynamics 365 Finance and Operations environment:
# Getting settings
$file = "YOUR_EXPORTED_DP.zip"
$saname = "YOUR_STORTAGE_ACCOUNT_NAME"
$containername = "CONTAINER_NAME"
$key = "ACCESS_KEY"
$environmentUrl = "Dynamics365FNO_ENVIRONMENT_URL"
Next, we get the SAS URL for the source, using the Azure PowerShell module, which is the storage account we’ve created earlier. To make sure we don’t mess up with the SAS token, we’re only giving it 2 minutes of validity:
# Get source blob URL
$ctx = New-AzStorageContext -StorageAccountName $saname -StorageAccountKey $key
$blob = Get-AzStorageBlob -Blob $file -Container $containername -Context $ctx -ErrorAction Stop
$StartTime = Get-Date
$EndTime = $startTime.AddMinutes(2.0)

$sourceUrl = New-AzStorageBlobSASToken -Container $containername -Blob $file -Permission r -StartTime $StartTime -ExpiryTime $EndTime -FullUri -Context $ctx
We have the source URL, now we will get the destination URL for our MSDyn365FO blob storage account using the OData action GetAzureWriteUrl. We request an authentication token to do the call and generate a filename using the current date and time to make sure the filename is unique:
# GET BLOB DEST URL
$headers = New-Object "System.Collections.Generic.Dictionary[[String],[String]]"
$headers.Add("Content-Type", "application/x-www-form-urlencoded")
$headers.Add("Accept", "application/json")

$body = New-Object "System.Collections.Generic.Dictionary[[String],[String]]"
$body.Add("tenant_id", "yourtenant.com")
$body.Add("client_id", "AZURE_APP_ID")
$body.Add("client_secret", "SECRET")
$body.Add("grant_type", "client_credentials")
$body.Add("resource", $environmentUrl)

$response = Invoke-RestMethod 'https://login.microsoftonline.com/yourtenant.com/oauth2/token' -Method 'POST' -Headers $headers -Body $body
$response | ConvertTo-Json

#UPLOAD/copy from source to dest
$headersDest = New-Object "System.Collections.Generic.Dictionary[[String],[String]]"
$headersDest.Add("Content-Type", "application/json")
$tokenAuth = "Bearer " + $response.access_token
$headersDest.Add("Authorization", $tokenAuth)

$currDate = Get-Date -Format "yyyyMMdd_HHmmss"
$uploadId = "restoreDP" + $currDate + ".zip"
$bodyDest = '{"uniqueFileName": "' + $uploadId + '"}'
$getAzureUrl = $environmentUrl + "https://static.ariste.info/data/DataManagementDefinitionGroups/Microsoft.Dynamics.DataEntities.GetAzureWriteUrl"

$responseDest = Invoke-RestMethod $getAzureUrl -Method 'POST' -Headers $headersDest -Body $bodyDest
$responseDest | ConvertTo-Json
$objUrl = $responseDest.value | ConvertFrom-Json
$destinationUrl = $objUrl.BlobUrl
We have both SAS URLs, so we’ll use azcopy to get the data package we exported to restore and copy it to the target environment where we’ll restore it:
#COPY TO TARGET
$fileNameCopy = "c:\temp\" + $uploadId + ".zip"

$(build.sourcesDirectory)\azcopy.exe copy $sourceUrl $fileNameCopy --recursive

$(build.sourcesDirectory)\azcopy.exe copy $fileNameCopy $destinationUrl --recursive
And, finally, we have to trigger the import using the ImportFromPackage action with the parameters for our FnO environment in the body:
# EXECUTE IMPORT
$headersImport = New-Object "System.Collections.Generic.Dictionary[[String],[String]]"
$headersImport.Add("Content-Type", "application/json")
$headersImport.Add("Authorization", $tokenAuth)

$bodyImport = "{
`n    `"packageUrl`": `"" + $destinationUrl + "`",
`n    `"definitionGroupId`": `"ImportDP`",
`n    `"executionId`": `"`",
`n    `"execute`": true,
`n    `"overwrite`": true,
`n    `"legalEntityId`": `"USMF`"
`n}"

$executeImportUrl = $environmentUrl + "https://static.ariste.info/data/DataManagementDefinitionGroups/Microsoft.Dynamics.DataEntities.ImportFromPackage"

$responseImport = Invoke-RestMethod $executeImportUrl -Method 'POST' -Headers $headersImport -Body $bodyImport
When the last REST call is done we can go to our Data management workspace in Dynamics 365 and see the job is there:
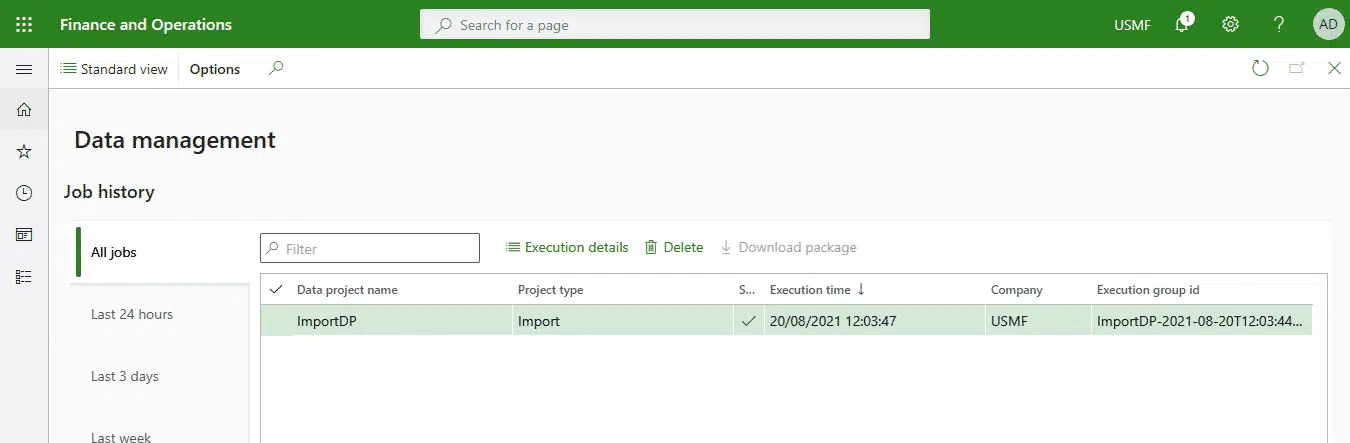
And done! Now we can refresh an environment with data from production and get it ready to use after changing all the parameters we need or even enabling some users.


